Hi Everyone, odds are good that you’ve been directed to this site from one of my books. The Road Home and The Day After (sequel to The Road Home) both pointed to www.PreparedBlog.com. Personal Emergency Communications – Staying in Touch Post-Disaster pointed to www.EmergencyCommunicationsBlog.com.
The Road HomeThe Day After (Sequel to The Road Home)Personal Emergency Comms
And there was one more blog… www.HamRadioBooks.com, in which I wrote several reviews of radio-focused books.
They’ve all been migrated! And now everything is here, in one, convenient location, for your reading pleasure :-). And it will be here for the foreseeable future.
(Please note that the publication dates for the articles were reset when I migrated the content. Apologies if that mattered to you for any reason.)
Law enforcement, fire, medical, emcomm team members, Emergency Operation Center managers, other emergency services personnel and managers, business continuity (BC) or continuity of operations (COOP) coordinators, please pay attention. Being able to use most of your key emergency plans in a serious event will depend on what I discuss next.
Have you tested emergency response plans for your communications teams or emergency office? Maybe you’ve worked through a county-wide earthquake drill or simulated hurricane or tornado response. Most of us have done some testing or exercise. But a key part of these exercises is usually not covered. Specifically, who does the work if families are in danger? In other words, how well will those plans work if nobody shows up because they’re busy trying to determine whether their families are safe?
No Personal Emergency Communications Plan?
Most emergency operations people I meet are generally well-prepared for a short-term problem, with at least the three days of food and water, a CERT class under their belts, first aid, CPR and other basic certificates in place. But in a recent talk I gave to an audience of emergency management professionals in government and the private sector, I asked how many of them had a written, personal emergency communication plan. The results were eye-opening. Less than 10% of the audience raised their hands. While it may be different on your team or in your office, the numbers aren’t surprising to me. Very few people have answered “yes” when I ask whether they have a written plan. I aim to change that, slowly but surely…
Let’s be clear about the problem: most of the people we will need to rely on during or right after a disaster do not have a personal emergency communications plan. It doesn’t take a rocket surgeon to take this one step further. If the people who are already personally and professionally actively engaged in emergency preparedness don’t have a personal emcomm plan, the vast majority of people in their offices won’t either. The people they rely on won’t be available. When we test our official plans, we assume our emergency personnel will be present. In many cases, they won’t.
Here’s another way to look at it. If you are at work and your area is hit by an earthquake, twister, unexpected flooding, power outage or anything else that could seriously impact your family, what will be your focus? For that vast majority of us, our top priority will be to ensure our families are safe. Everything else is lower priority, even if our job is to help others in emergencies. Read about Paul Schubert, 30-year police veteran who needed to care for his wife after Katrina hit: http://www.usatoday.com/news/nation/2006-02-20-neworleanspolice_x.htm. If you get to the end, you’ll see the crux: “I chose my wife,” Schubert says. “It was a no-brainer.”
For the ~10% of the exceptionally well-prepared people who do have personal emcomm plans, I’ll ask you another question. Can you manage your offices alone? Can you do everything that needs to be done all by yourself, after a natural disaster or other emergency? Most of you will probably answer “no.”
This is a glaring gap in our overall ability to respond to a disaster at all levels. No amount of equipment and supplies will prepare us to survive disaster without any trained personnel to lead, communicate, coordinate logistics and distribution, etc. An emcomm plan for yourself and everyone you depend on is critical for every member of any emergency response organization.
How Do We Fix This?
What’s the solution? Just as with our planning at the city/county/state level, we should have a written and tested personal emcomm plan for every critical member of our various emergency response teams. This idea certainly shouldn’t be foreign, but it is still generally overlooked.
What kind of plan are we talking about? As with our “professional” plans, a plan needs to take the following into account:
Who? (e.g., family, friends, possibly neighbors we feel responsible for)
When do we attempt communication? If phones don’t work, when do we use precious battery power to transmit or listen?
What gear do we use at which time? Do you try with an FRS/GMRS radio, amateur radio, satphone? Which frequencies or channels do we use if the first ones are busy?
What are the backup plans, and what are their schedules?
Do you have a template for a plan? You can get one for free here.
Along with a realistic and tested plan comes equipment and training. Family members should be equipped and trained to use the appropriate technology for your budget, terrain, distances, etc.
Do you need more information? Dozens of tips on planning, technology specific gear are covered in my book Personal Emergency Communications, available on Amazon.com in print, and in Kindle and Nook formats soon.
Do You Really Need a Personal Emergency Communications Plan? You tell me.
I recently wrote an article titled “A Chink in Your Emcomm Armor“, in which I described the need for people in emergency communications roles of any kind to have personal emcomm plans, in order to ensure they would be available in an emergency, versus doing their best to get home and check on family, neighbors, etc.
Then I went to EMCOMM West, a fun gathering of emcomm professionals in Reno, Nevada. The audience for my talk was about 50 people (I was excited to speak to a crowded room!), and I asked the same questions I’ve asked before.
“How many of you have some kind of emergency communications role, whether paid or volunteer?” Everyone but one person raised their hands.
“How many of you have a personal emergency communications plan?” … Not one hand went up.
I see this as opportunity, and in fact the topic of my class was “How to create your personal emcomm plan,” and we walked through a template, with people filling in options as we went. So am I surprised by the answers I got? No.
Now I have a different question, for everyone. Do you think people really need such a plan? Is it overkill? Am I tilting at windmills when I propose that everyone who has an emcomm role should have a personal plan in place? For that matter, what about people who aren’t interested in emergency communications, but who are still interested in disaster preparedness in general? I’d love to hear what you think. Maybe I’m biased. Maybe I’m taking an extreme approach. Or maybe I’m right on the money. What say you?
APRS gives your radio some fascinating flexibility! But what is it? ‘APRS’ stands for Automatic Packet Reporting System, a system developed by Bob Bruniga, whose call sign is WB4APR. (In case you’re wondering why the call sign matters, ham guys like you to know what their call sign is, in case you come across it on the airwaves sometime.)
It’s an interesting, flexible, and useful system, which allows users to transmit text messages, alerts, bulletins, etc., in addition to their GPS coordinates. It’s a form of digital communication that you can use with handheld, mobile, and base station amateur radios.
You might be able to imagine how handy this system would be for people on search and rescue missions or during other emergencies, aside from during everyday communications. A rescuer can transmit his or her location while searching for a victim. A support vehicle on scene or a vehicle on the way to help could be located in an instant on a map, at any time. A standard status report could be given with a few button clicks. That’s cool!
A ham radio operator is issued a call sign by the FCC, after he or she passes a licensing exam. The call sign is used to identify the person operating the radio, whenever transmitting on ham frequencies. Since 1934, west of the Mississippi, call signs that start with “K” are issued, and east of the Mississippi, call signs that start with “W” are issued. If you listen to music on the radio in the car or at home, you will occasionally hear the station announce “This is KMPS” or “You’re listening to WKRP” (or some other combination of letters) – this is their call sign, also issued by the FCC. Since the station is a business, their call-sign is a slightly different format, but the idea is the same. People who talk on certain frequencies have to identify themselves with a call sign. When you get your license, you’ll get your own call-sign!
If you’re willing to pay a few dollars extra, you can get a call-sign with letters and numbers that you choose, called a “vanity call sign.” And depending on the level of license that you choose to get, they will be anywhere from four to six characters long. If you are able to get the “Extra” license, you can get a call sign with four, five, or six characters. Having a “General” license will allow you to use five or six characters, and the “Technician” license will allow you to use six. If you prefer, you can keep the original six-character that you are issued by the FCC, regardless of what additional licenses you may get later. Here are some fun possibilities, combining different characters: N0HOW, K1SS, K0RN, W0MAN, WA5HME, and KN1TTR. When it’s your turn, you choose!
The Quick Version: You transmit a message with your radio, the repeater receives the message, and the repeater simultaneously re-broadcasts that message, usually with much more power and range.
Now for the some interesting details…
Many repeaters listen for a special tone, which is included in the signal that carries your voice when you transmit your spoken words. Usually this is programmed into your radio when you set up the frequency to use with the repeater. Without that special tone, the repeater won’t repeat what you transmitted.
The offset tells your radio what distance to move up or down the frequency spectrum, in order to order to match what the repeater will receive and transmit.
For example, a repeater will receive a signal on 146.050 MegaHerz (MHz), and then re-transmit that same signal on 146.650 MHz (with a lot more power and range, so that many more people can hear it).
This means that when you use your radio, you will press the transmit button, your radio will transmit your voice on 146.050 MHz, the repeater will receive your transmission, and then it will re-transmit it on 146.650 MHz. That way your radio can both broadcast and hear any replies, but now instead of having limited power and range (since in this case, you may be using a low-power handheld radio), now your message can be broadcast from the top of a nearby mountain (where repeaters are often located) with many times the power. Cool, right?
What is ham radio? It’s the term people use to refer to amateur radio, a fun hobby for many. But why “ham”? Some people speculate that it’s because certain people involved in amateur radio back in the old days really loved to talk, to and would “ham it up”, telling long stories to their buddies when they’d get together on the airwaves to chat.
How does ham radio work? The Federal Communications Commission (FCC) has set aside certain frequencies for people to use for non-business-related communication. People use these frequencies to talk to each other using different kinds of radio equipment. Not only can you talk back and forth on these radios, you can also send text messages, transmit GPS coordinates, talk to repeaters, send and receive TV signals, bounce signals off of satellites or even the moon. Some people have even used hand-held radios to talk with the International Space Station! That’s right – a person on the ground aims an antenna upward, tunes a radio to the right frequency, and has a conversation with an astronaut who is also a ham radio operator. Pretty crazy, right?
To use a radio that works on amateur radio frequencies, you need to take a simple test and get a license. The first license, called “Technician”, is not difficult to get, and there are a variety of books, CD’s, and websites available to walk you through the questions and answers which are all published already. Once you’ve reviewed the material and feel comfortable, you can take a test and get your own license! Many ham radio clubs administer the tests, and will be happy to help you with the simple paperwork at the same time. Soon after, you’ll get your call-sign from the FCC, and you can get on the air!
Amateur radio is an incredibly flexible and powerful communication option, especially in a crisis, and it’s probably easier to learn about and get involved with than you think. In this and the next two articles, I’ll walk you through the basics, and show you the simple steps you can take to add a very useful tool to your preparedness toolbox. It’s easy, interesting, and if you want to be realistically prepared to take care of yourself and your family, you’ll need this information!
My Amateur Radio Background
I have been involved with ham radio for a few years now, and I’ve learned a lot. From the start, I took my Novice and General exams, and then a year or so after that, I took and passed my Extra exam. (For me, Novice & General weren’t difficult, but Extra was.) I’ve been actively involved in my local ARES (Amateur Radio Emergency Services) team for the City of Redmond, talking to friends on the radio, experimenting with digital modes, NVIS (more on that in article #3), satellite communications, and more. It’s been enjoyable and educational. And there’s one very interesting thing I’ve learned during this process, which will benefit you directly. Much of the learning material out there doesn’t make it easy! This case will be different, however. My goal is to make some of these concepts much easier for you to understand. I’m going to explain things not in the manner of an electrical engineer, but like a regular guy would. Here goes.
In this article, we’ll start with the basics, and give you some ideas for getting more information. In subsequent articles, we’ll talk about specific equipment, technologies, frequencies, some interesting information on what’s really allowed during an emergency, and more.
What is Amateur Radio?
Let’s start with “What is amateur radio?” Amateur radio is a fun hobby for many, also known as “ham radio.” But why “ham”? Some people speculate that it’s because certain people involved in amateur radio back in the old days really loved to talk, and would “ham it up”, telling long stories to their buddies when they’d get together on the airwaves to chat. In any case, in this hobby you can find people building radios, antennas, and other radio-related equipment, experimenting with all of it, and talking on the airwaves in many ways, which I discuss with a little more detail below.
How does amateur radio work? The Federal Communications Commission (FCC) has set aside certain frequencies for people to use for non-business-related communication. To use a radio that works on amateur radio frequencies, you need to take a simple test and get a license. The first license, called “Technician”, is not difficult to get, and there are a many books, CDs, and websites (with free sample tests) available to walk you through the questions and answers. Once you’ve reviewed the material and feel comfortable, you can take a test and get your own license. (Subliminal suggestion: Do it. It’s easy.) Many ham radio clubs administer the tests, and will be happy to help you with the simple paperwork at the same time. Soon after, you’ll get your call sign from the FCC, and you can get on the air!
Why does this “hobby” (it’s much more than that to many, especially people who need it in a pinch) matter? It doesn’t take a lot of imagination to come up with a scenario where cell phones don’t work. You’ve probably been out of range of a cell tower at some point, and wanted to make a call. But imagine if there was no coverage, no matter where you went…And a phone call could mean life or death.
I can clearly remember standing outside my office building after Seattle’s Nisqually Earthquake in February of 2001. Many people were trying unsuccessfully to make calls with their cell phone. I remember one woman standing near me, sobbing because she was worried sick about her family. No cell phones worked. The tower in the area was powered up, however it was also overloaded. When everyone tried to call at the same time, it stopped allowing calls through. But in other areas, people lost cell coverage because the towers lost power or were damaged by the shaking. And that’s just one example of how our most commonly used method of communication can disappear. A winter storm, hurricane or tornado, or even solar activity could make your phone essentially useless. And there’s another possibility: the government could shut it down. A couple weeks ago, officials in San Francisco decided to shut off cell service on public transit in order to prevent a possible demonstration. That should give you something to think about.
What Can You do With Amateur Radio?
Aside from being fun to play with just talking with friends, amateur radio is a very effective way to communicate during an emergency. With something as simple as a small, handheld radio, an operator can do these things in addition to voice communication:
Sent small or large amounts of data directly (without email software needed, with a computer attached)
Transmit any of the above directly (line of sight) for several dozen miles or more (depending on antenna type and height, amplifier use, etc.)
Transmit using existing, publicly available repeaters to achieve long range communications with a small, low-power radio
By using a mobile (in a vehicle) or base station (usually on a desk) radio, along with an appropriate antenna, a ham radio operator can communicate across great distances, even across continents and oceans. Here’s an interesting example: I listened to a ham radio operator as he transmitted and then moments later received his own transmission after it bounced its way through the atmosphere, all the way around the earth!
What can you do right now to get started? Go get your FCC Technician license. It’s easy, really. The FCC publishes all of the possible questions and answers, and you can find good resources for practice tests here: http://www.arrl.org/exam-practice. It’s a simple, 35-question test and if you pass, your license is free and is good for 10 years! (Note: License exams hosted by volunteers usually charge a small fee, around $15, in the U.S.)
In the next two articles, we’ll talk about UHF & VHF radio (often used for local communications), HF radio (which can be used for local/regional as well as long-distance communications), different things you can do with your radio, antennas, and more. In the meantime, if you’re interested in learning more, do an Internet search for local ham clubs and ARES/RACES groups in your area, and contact them. You can probably find people in your area who would love to talk about what they do. All you have to do is ask!
Getting your ham license is easier than you think.
If you want to be able to use the fancy radio gear that the hams get to use, participate in a local emergency communications team, be prepared to communicate with family and friends even when your cell phone or land-line service disappears, or do the many other cool things that licensed amateur radio operators get to do, you’ll need an FCC license.
Here’s the quick version, with explanation and resources farther down:
Study all the Q&A ahead of time, using a book or flashcards or CD or whatever
Take as many practice exams as you want to online, for free
Take the exam
Get your license from the FCC, for free
“Oh no! It must be very difficult jump through all the hoops to get such a license,” many of you are probably saying. Or “How could I possibly learn all of those technical concepts without an electrical engineering degree?”, or “There’s no way I could afford the huge licensing fees.” Good news – none of this is true! It’s easier, probably much easier than you think.
The test is easy to pass, and the license application is ridiculously simple. Not only that, the people who administer the test will enthusiastically help you with any questions you have about the application.
When it comes to the content of the test, the concepts are not complicated. The electronics information you’ll need to know is super-simple. But wait, there’s more. Have you heard of the… metric system? You’ll need to know about that too. And can you remember some very complex rules? For example, “You have to say your call sign at least once every 10 minutes when you’re talking on the radio.” Remember some rules, some numbers and letters that matter to the FCC, and you’re just about ready.
I’m trying to make the point that the test is easy, because it is. But I have one more bomb to drop. Ready? Every possible question and answer you could get for the exam is already published and available for you to study. Yeah. It doesn’t get any easier than that. You will need to review the Q&A before you go take the test, because a lot of the info isn’t stuff you’ll read about in People magazine, or Wired, or whatever you usually read.
Once in a while you hear about someone who didn’t pass the Technician exam. I can only guess that the reason why is 1) very poor test-taking skills (e.g., not paying attention to which letter you’re filling in on the answer sheet, even when you know the right answer), or 2) lack of any studying whatsoever (that must be the case for some folks, just like in school. But you don’t have to take the ham test, so why bother? Peer pressure? I don’t know.)
So why do I even need to write an article on this, if it’s so easy? Because I want to make it even easier, to help anyone pass the test and get that license and open the doors to all the fun that ham radio can bring. Here are some tips:
Start by figuring out how you learn best. Since you already know that all of the Q&A are available, you will need to best way to review them so that they’ll stick in your head. Do you learn by reading and remembering? There are a few good books out there that have the Q&A, as well as additional supporting info, to give context to the answers. Do you do better with flashcards? They have those too. Maybe you learn by listening? There are Q&A CD’s with which you can review. Or maybe you’re like me and you learn how to pass the test by taking practice tests. They have those too, online and free. Or if you like, you can pay someone to access their online test-taking tools, which track your progress. You can find a variety of online resources later in this article.
One other tip, which you can use on any test that gives you Q&A in advance. Only read or highlight the correct answers in your study guide. Cross out the wrong answers and only ever review the right answers. After you go through all of the questions, however many times you like, you will have only imprinted the correct answers on your brain, and when it comes time to take the test, you will only remember the correct answers! 🙂
Here are some online testing resources. You can take the tests in advance, as many times as you want, for free! (There are other sites you can pay for, but take a look at your free options first):
Note: If you have only read one or two chapters of a licensing book and want to take a free online test, and then only get 15% correct, don’t get frustrated and give up! You will need to review the rest of the material in the license book. If you go through all of the Q&A before you take an online test, you will get much better results. I know that may sound like common sense to many of you, but I know a lot of folks who are so itching to take the test that they don’t review all the Q&A first, and they wondered why they didn’t get all of the answers right. 😐 But I know you’re smarter than that.
What did I do? I started by reading through both of the Q&A books I list below (but I often take an overkill approach). Then I read a book that explained additional info for beginners to ham radio, because I was curious about how ham radio worked. And then I took a few practice tests, until I could reliable get a score greater than 80%. After that, I focused on areas where the answers made the least sense to me, practicing those a few more times, making sure I had the right answers fresh in my memory. This approach made passing the test a piece of cake.
Find the study approach that works well for you, and when you’re ready, take a couple practice exams. Once you can pass the online test regularly at 80% or higher, you should be ready to take it for real.
You can do it! Seriously – how often does the test you’re taking already have all of the answers available?
Where to Take a Ham Radio License Exam
Finding a place to take the exam should not be difficult. When I looked, I had a hard time finding a place, but I was on my own with nobody to help me. These resources will make it much easier for you!
Here is one way to find a place giving an exam, from the ARRL: http://www.arrl.org/finding-an-exam-session. (By the way, I recommend that once you get your license, you join the ARRL and get your subscription to QST Magazine, full of great articles on amateur radio every month. The ARRL helps keep amateur radio frequencies available to us all, and the magazine is a great way to learn more about the hobby.)
Eventually you’ll find out where the testing takes place in your area. And that’s it. You can review all the answers at your leisure. You can find a club nearby who will let you take the test and help you (if you need it) with the simple FCC form.
Ham Radio FCC License Fees
And then you pay. Oh yeah, I forgot to tell you. The cost of a license is expensive… NOT! An FCC amateur radio license is FREE. You may have to pay ~$15 to take the test, so that the club running the testing can pay for supplies, room rental, postage to ship off your answer sheets to the FCC, etc., but you read correctly about the cost of the license. Free.
But wait, what about when you renew, 10 years later? (Yeah, every ten years. Pretty convenient, right?) That’s when you have to pay, right? No, it’s still free. However, there is a special circumstance when you could pay, if you really wanted to. If you want a “vanity call sign”, which means you can pick some of the letters and/or numbers (if that combination isn’t used already). Some hams do that with their initials (like me – my call sign is AB8L). So that must be expensive, right? Sorry to disappoint you once again. It’s $14.25. For ten years. And the cost is the same when you renew, 10 years later.
One more thing — the first license level is called “Technician“. It allows you access to a certain set of UHF, VHF, and some HF frequencies, which will give you the ability to do short- and some medium-range communicating. The second license is called “General“, and gives more access to more frequencies, including a lot more of the HF spectrum, which will be important for medium- and long-range communications. Tip: if you are studying for the Technician exam, you may want to do the General exam at the same time. You can take more than one test in the same testing session for no additional charge! (And the license is still free.) The last type of license is called “Extra” and gives access to all of the frequencies available to amateur radio operators. You will probably need to study a lot more for the Extra exam – it’s quite a bit harder. But Technician and General are probably all you would ever need.
Now what? Have I covered all of your questions and concerns? If you have any questions, post them and I’ll reply.
Now go out and get a license, and I hope to hear you on the air soon!
The Yaesu VX-8R packs a lot of features into a tiny package. How tiny? Take a look! It’s about the size of a deck of cards, if you unscrew the antenna. Take a look at this:
What can you do with this radio? You can talk on four different amateur radio bands (50/144/222/430 MHz, if you’re interested), while listening to broadcast radio (for example, FM radio) at the same time!
You can use a Bluetooth headset with it, and you can attach a GPS receiver to the radio or to a an attached speaker microphone. When you have GPS installed, you can also use APRS functionality, which means you can transmit your location to other radios, can send and receive simple text messages, and more.
If you wanted to get creative, you could even attach an special antenna and talk to an amateur radio satellite! It can receive weather alerts on special weather radio channels, can easily communicate with repeaters, and more. This is an amazing radio.
The VX-8R has been replaced by the VX-DR and the VX-GR. They’re all small, powerful, and loaded with features. Take a good look at the specifications, since there are some differences.
You can get more information at www.Yaesu.com, on the VX-8R, the VX-DR, and the VX-GR.
Of course, the antenna adds some size to the radio, but you have many options, from very small (usually inefficient, for short-range communications) to longer (more efficient, if you can conveniently carry it). For example, in the picture directly above you can see the VX-8R with a Diamond whip antenna, which is quite efficient. Soon, I’ll post a picture of my “stealth” antenna. It’s very small, and very inefficient, but very convenient when I need to carry my radio in an inside jacket pocket and only need to communicate short-range.
Is the VX-8R the only small radio? Is it the only one that does APRS? Are some easier to use? No, yes, and yes! Some other common, powerful, feature-filled radios are Icom’s IC-91A and Kenwood’s TH-F6A. And there are many more. Do your research and you’ll find a radio that fits you well.
Frequency-hopping, spread-spectrum communications – available to everyone with no license!
Do you have anything private to discuss on the radio? Are you concerned about people listening in? Are you tired of hearing neighbors, vacationers, and random kids constantly blabbering on all the channels of your FRS/GMRS (common handheld) radio when you have important business to get done?
Did you know that high-tech, frequency-hopping handheld radio communications are available without a license? Did you know that FRS/GMRS radios usually have only 22 channels, and that a new system has 10,000,000,000 “channels” available? To learn what this amazing, little-known (until now!) technology is, keep reading. I’ll start with a few questions, and then dive into the specifics.
THE PROBLEM
Do you have a plan for communicating during an emergency situation? What about if your cell phone and land-line phone aren’t available? I have an option for you that few people are aware of, which has some amazing, high-tech capabilities. Prepare to be amazed… in a minute.
Let’s set some context. If you’ve been reading my blog, and if you’ve read my Emergency Communications Primer (free when you sign up for my newsletter), you’ll know that you have a few options, and the most useful are FRS/GMRS and amateur radio. (There are some other options, e.g., CB and marine radio, which may be applicable for you, in your area, but they still have a limited number of channels available, just as with FRS/GMRS).
Every option has its pros and cons. The easiest and least expensive option is usually the FRS/GMRS (Family Radio Service / General Mobile Radio Service) radio, and that’s what many people have already. But for about the same price, and the same effort (relatively low price, no license needed) you have another option, and option that changes the game significantly.
Let’s quickly look at another key limitation of FRS/GMRS. Since this system has a limited number of channels and since these radios are so common, you should expect to have noisy competition for use of your radio at times (depending on your location – more people will mean more noise), and that’s the last thing you’ll want in an emergency. In addition, you may want an option that you can’t get with ANY other system, whether FRS, CB, marine, aviation, amateur radio, or even public service (police, fire) frequencies (which you can listen to on a scanner). What is it? Privacy.
None of these other options mentioned (unless law enforcement is using scrambled radios – that’s a different beast, and usually unavailable to non-spook civilians) allow you to speak in private. Anyone with a similar radio or a scanner can listen to your conversation. Do you want to have a sensitive conversation? Do you need to discuss a topic that would put you in danger if someone else could hear it? Of course, you’re not going to talk about moving your gold hoard from your house to the one down the street, but what if you needed to ask a neighbor for help because you hurt your back and couldn’t get up off the floor? And what if another “neighbor” somehow heard what was going on, knew you or somehow determined where you lived, and decided to liberate you of your emergency supplies or anything else? What if you live in an area where have to assume that some of the people listening are not good people? And if you find any of those scenarios unlikely, what if you simply prefer privacy for privacy’s sake?
If you only have FRS or amateur radio, assuming your frequency is available in the first place, you can “obfuscate” (confuse other listeners) your conversation by talking in code. Per FCC rules, this is not allowed on amateur radio frequencies (although it’s unlikely that the FCC will be enforcing such rules during the time of a disaster), and anyone can still listen in. You may even attract unwanted attention with this approach (unless your codes sound like normal conversation). This also means you and whoever you’re talking with will need to remember what the code words or phrases are, especially if you’re stressed out! Talking like you normally talk would be much easier. There must be an easier way…
THE SOLUTION
There is! It’s time! We have a solution. You can use these relatively new, effectively un-interceptable radios that use “Frequency-Hopping Spread Spectrum” technology. (Although I suspect that the FCC/The Man could intercept them, using fancy, uncommon gear. The traffic isn’t encrypted. It’s just transmitted in a different way.) These radios constantly switch from one frequency to another during the transmission, and they automatically synchronize between radios. If you were trying to listen in and monitored any single frequency during the discussion (which is what a scanner will do – one frequency at a time), you would theoretically hear a microsecond blip of noise, and nothing more. If you have a compatible radio, however, you hear the whole conversation! Nobody else can hear a thing.
There is one brand of radio that uses this technology, available to the general public. It’s called TriSquare eXRS, and you should probably get one, if you need to be able to talk without interference, don’t want casual listeners to be able to intercept your conversation, and want some other cool options built in.
Additional Specs
These radios use the 900 MHz frequency band, which will limit your range in some ways, as with FRS/GMRS. Every set of frequencies will have different propagation characteristics (meaning that the radio waves can travel farther in certain cases, or through different materials better or worse than others). These radios put out one watt of power, which is relatively low (although twice as powerful as a 500 milliwatt FRS radio, and less powerful than a GMRS handheld radio, which is usually between one and five watts).
Let’s be clear: these are not long-range, powerful ham radios. They are short-range radios, useful for conversation in your neighborhood, between nearby buildings, cars in a convoy, etc.. Don’t expect them to work 10 or 20 miles away. In my experience they work for a couple miles in open territory, and for a couple hundred meters in downtown, steel-and-concrete city territory, depending on what’s in your way. Of course, if you don’t have buildings between radios, the range grows considerably. Nonetheless, they still have some incredible features to offer. Keep reading.
From TriSquare website, with my highlighting added:
“[The eXRS radios have the] added benefit of wide band digital security and privacy provided by the frequency hopping spread spectrum algorithm. Maintaining the information signal as narrow band FM modulation centered on discrete frequencies allows for a large pool of non-overlapping hopping frequencies to draw upon within a given section of the radio frequency (RF) spectrum. The pseudo-random drawing of the hopping frequencies spreads the total signal power equally over the entire bandwidth of the RF spectrum used, which ensures minimal interference between many simultaneous, independent users.
Interference Free is a major advantage that eXRS has over existing FRS and GMRS radios. Based on a contracted study from the Electrical and Computer Engineering Department of a major university, more than 100,000 eXRS users within talk range can enjoy uninterrupted communications. Whereas, FRS/GMRS quickly becomes unusable with just a few tens of users within range of each other. Bottom-line is that the eXRS two-way radios provide private communications in areas where FRS/GMRS conversations can be congested or impossible.”
Let’s talk features. The radios are not set up to talk on FRS/GMRS frequencies, and can only communicate with other eXRS radios. This shouldn’t be a surprise. They can receive NOAA weather radio transmissions, which is great (and don’t underestimate the value of weather radio – it’s super-handy!).
Here are some of the cool features available, that I haven’t seen on any other radios:
You can identify any specific contact or group of contacts using unique alphanumeric codes
You can page/call a specific radio or person using a unique (5 available) tone
You can select a group or an individual, depending on who you want to talk with
You can identify any radio with a 10-digit number, which gives you about 10 billion options!
Call waiting!
Voice-operated (“VOX”) operation
Text messaging (sending whatever message you like, or pre-defined messages), and your radio can store messages as they come in, and you can retrieve them at your leisure
You can clone radios or transfer contacts, no cables needed
And now they even come in camouflage 🙂
These radios are truly awesome!
There are two models, one with just a few keys (TSX100), and one with a full keypad (TSX300). I recommend the full keypad, because it gives you more flexibility. It costs a bit more, but I think the added ability to easily enter numbers, etc., make it worth it.
If you aren’t inclined to get an amateur radio license (although I highly recommend it – it’s easy and extremely useful!), this can be a useful way to communicate in a densely-populated or otherwise noisy area, or if you need privacy and text messaging features. Plus, these radios are just plain cool!
I’ve written about some other radios, and have discussed various amateur, FRS/GMRS, and other two-way radios, but the Midland XT511 is one of the best options out there when it comes to very basic, general emergency communication equipment that requires no license or training.
The Midland XT511 is a full-featured, FRS/GMRS/NOAA/AM/FM radio with a variety of power options for emergency use.
Here is a quick run-down on the features packed into this compact package:
Charge your cell phone or other USB-connected devices
LED Flashlight
AM and FM radio reception
NOAA weather radio reception, including hazard alerts
Transmit and receive FRS/GMRS, with privacy codes and other features available
Scan FRS/GMRS traffic in your area
Not only does is have AM & FM reception, FRS & GMRS (two-way), it has a built-in weather radio. But that’s not the best part. It also uses four AA batteries and has a separate, built-in rechargeable battery pack, which can be charged by the included AC and DC charging cords. But we’re still not at the best part. Here is a big difference between this radio and many others: it has a hand crank that folds out from the side, which will allow you to
The included 700 mAh, 6.0V, rechargeable Ni-MH battery pack.
recharge the batteries with no other power source. In addition, you can use the USB port to charge other devices (e.g., your cell phone) by turning the crank. All of these features fit into a package that’s smaller than I thought it would be. This radio is quite flexible!
As you can see here, the XT511 can be powered with AA batteries, its internal rechargeable battery, a DC power supply, AC power supply, and the crank arm. This is a great set of options for an emergency radio.
You can see some of the many features available in the sticker that covers the display, fresh out of the box.
That’s a decent set of features in a handy, small package, and this radio should at least be on your “emergency” shelf. along with your spare batteries, lantern, extra food and water, first-aid kit, and other supplies.
I still recommend a set of FRS/GMRS radios as one of the most important emergency communications tools for everyone, but at the same time I think this radio is just as important. While your existing handheld radios should operate on AA batteries in addition to a rechargeable battery pack, and should also receive the NOAA weather (or “all-hazards”) channels and alerts, it’s unlikely that they can be recharged manually like this one. In addition, it has a built-in three-LED flashlight (which is relatively bright). Did I mention that the device has a lot of features?
It also has a handheld microphone/speaker, with a couple of interesting options. The plug is two-part. One part of the plug fits in the microphone jack,and one fits into the speaker jack. When it’s plugged in, as you probably expect, the built-in microphone and speaker on the front of the radio are disabled. But what if you still want to operate the hand-microphone quietly?
The convenient headphone jack in base of the handheld microphone (shown with the attached plug out of the jack) makes it easier to use and hear the radio in noisy or quiet environments.
The handset has another speaker jack, into which you can plug an earpiece. Good thinking on the part of the engineers. The features just keep coming!
So far, the radio is working fine for me. To echo one of my coworker’s comments, while some of the dials may seem a little bit loose, the radio still appears to be plenty sturdy and is holding up well. Most of the reviews I see on Amazon also seem to indicate similar experience.
As you can see on the box in the first picture, the Midland XT511 is called “Base Camp Radio,” and I think the description is a good one. While it’s not the first radio I’d put in my backpack, due to its size (even though it isn’t that heavy), it’s a great radio to have at home or wherever else you call your base camp, especially if you have an emergency where you lose grid power, even long-term.
Why mess with amateur radio? What’s cool about it? Why put in the time and effort, just to talk to someone, especially when you already have a phone? Take a deep breath and the answers will be revealed… There is more here than meets the eye.
1. The Cool, High-Tech Gear
Amateur radio doesn’t look quite like this any more.
I’ll admit, at first I was intrigued mostly by the gear. I’m a gadget guy at heart, and I’ve always been fascinated by the latest, coolest gizmos, from smartphones to one-handed fire-starting devices, LED flashlights, and titanium multi-tools. And at first, I thought amateur radio gear was all old-school, nearly antique technology, walkie-talkies with huge antennas or big desk radios with multiple knobs and dials and an accompanying, huge chrome microphone like they used in the old days (see picture).
And I was partially right. There are walkie-talkies and big desktop radios. But the technology has been changing constantly, and I found those changes fascinating. The amount of change isn’t in the same order of magnitude as with massively-popular smartphones or high-resolution, flat-screen, 3D TVs with built-in Internet applications, but there have been big changes, including increased popularity of digital technology such as APRS and D-STAR, software-defined radio, and (tongue in cheek…) the use of 20th-century technology such as USB connectors in desktop and even some handheld radios.
Modern handheld radios are loaded with high-tech features! (Kenwood TH-D72A)
Nowadays, you can get small and very powerful radios jam-packed full of cutting edge circuitry. They don’t come with video-games, but they will transmit and receive all manner of radio signals very, very well. And for the hard-core gadget junkies among you, some of the hand-held radios even come with built-in GPS and Bluetooth support. 🙂
2. Open New Doors
Barring the destruction of our telecommunications infrastructure, amateur radio will never be as popular as texting, playing word games with friends, taking pictures and video, or listening to music on the latest, coolest phone. But radio still has allure, and not just because of the radios themselves. Now you’re wondering… if it’s not just about the gadgets, the apps, the bling with the two hundred million dollar advertising budget, what then?
It should go without saying that any serious prepper should have radios and know how to use them, SHTF, TEOTWAKI and all. But we’re talking about relatively common scenarios in which ham radio plays a vital role very often.
Do you like to help people when they’re in trouble? At the scene of an accident, are you the type of person who will call 911 instead of taking pictures with your phone? (I just talked to someone the other day who took pictures with his phone as a fire burned a nearby building. Nobody called 911 for several minutes, and he didn’t even think of it until later. Yes, there are people like that. But if you’re reading this article, you most likely aren’t.)
Amateur radio is frequently used in emergency situations in which normal communications aren’t sufficient, either because they are unavailable (e.g., tornado or earthquake destroys or temporarily disables normal communications infrastructure), overloaded (not enough cell phones to go around, towers or land-lines overloaded), or you just need a well-trained communicator to do the talking.
Local ham radio operators, as well as operators from out of the area, through local organizations such as ARES or RACES, the Red Cross, and other groups, volunteer in disaster areas to help people in need. You could do this too, if this type of volunteering floats your boat.
Are you not ready for that much stress? There are other ways to volunteer that are much easier. Consider the many options to get involved in your community when everything is “normal.” For example, event organizers very frequently recruit local ham radio operators (usually through clubs or emergency communications groups) to help at events such as foot races, bike races, parades, walk-a-thons, etc. These events are usually very complex to organize, and hams play a vital role in ensuring messages get transferred rapidly and efficiently, people are safe, and problems are identified before they get too serious. Aside from being a great way to practice using equipment and getting to know how it will work in which locations and situations, these events are usually a lot of fun anyhow.
3. Learn Stuff You Should Know Anyway
The great sci-fi author Robert Heinlein wrote:
“A human being should be able to change a diaper, plan an invasion, butcher a hog, conn a ship, design a building, write a sonnet, balance accounts, build a wall, set a bone, comfort the dying, take orders, give orders, cooperate, act alone, solve equations, analyze a new problem, pitch manure, program a computer, cook a tasty meal, fight efficiently, die gallantly.”
While he didn’t say “A human being should be able to operate a radio,” I bet he would have included it if he had more room. Many other important things didn’t make the cut, so ham radio operators shouldn’t feel slighted :-). And while I’m not a famous writer like Heinlein, I am a writer, so I’ll say this (and quote me all you like!):
“A human being should be able to operate a radio.”
Yes, everyone should have a basic idea of how to operate a radio. There are some simple things you should know, for example:
Push the button and talk into the radio, then let go of the button so someone can talk back
Yelling doesn’t make a radio transmit with any more power
Listening usually uses a lot less power than talking (and most people should probably listen more anyway)
But there’s bonus material. Everyone should also have a very basic understanding of what electricity is, what radio waves are, and how an antenna is used. We don’t need to know that on a day-to-day basis the same way we need to know to tie our shoes or how to not overdraw the checking account, but it’s still good information, and radios are a part of our world. For example, cell phones are radios…
Another thing people should know about, which ties back to number two on the list, is who will be available to help in an emergency. Do you know who your emergency communications (emcomm) volunteers are in your area? How about the location of your city or county emergency operations center? And an even better question… would they let you in to help in an emergency? Go get an amateur radio license, volunteer for the group, get a fancy access badge, and you’re in!
Don’t forget one of the biggest reasons of all.
It’s fun! The people are great. The technology is cool. The opportunities to learn and help others are endless. And the hobby is fun.
What do a bridge collapse and the Seahawks winning the Super Bowl have in common? If you were there, odds are good that you couldn’t use your phone.
Emergency Cell Phone Outage #1
On May 23, 2013, a truck with an oversized load crashed into the bridge structure on I-5 near Mount Vernon, WA. Aside from the bridge being taken out of commission, disabling traffic flow in the Interstate for almost a month, there was another issue: cell phone voice traffic came to a standstill.
How did that happen? Were all of the local cell towers built on top of the bridge? Did the truck also somehow hit a cell tower before taking out the bridge? Did an important communication cable run across the bridge? How could a truck hitting a bridge take away the ability to make a phone call?
The truck didn’t take out a cell tower. Everyone in the area afterward did. Everyone tried making calls at the same time, paralyzing local cellular phone systems. It was that easy. No earthquake, tornado, sun spots or alien attack required.
Emergency Cell Phone Outage #2
In 2014, the Seahawks won the Super Bowl. Washington fans were excited, to say the least. They were so excited, in fact, that on February 5, 2014 about 700,000 came to Seattle, into the same area at one time, to congratulate the team. In doing so, while calling their families, texting their friends, and updating their Facebook pages, they nearly took out downtown Seattle’s cell phone service. This was after cell phone companies, anticipating significant additional usage, upped bandwidth and brought in additional, mobile cell towers. In addition to significantly degraded service, it appeared that 911 service was being seriously impacted, and officials were so worried that they started making announcements, asking people to stop using their phones, to allow for emergency voice traffic.
What is your emergency communication plan?
The moral of the story (aside from “Stay away from sensationally-broken bridges and crowds of over 500,000 people”) is no surprise to a reader like you: You can’t always rely on your cell phone, especially if you are in or near an emergency that is bigger than your personal situation. Consider getting a radio to round out your communications toolset!
Of course, the naysayer would point out that if everyone had radios, those airwaves would be clogged up too, especially in an emergency. Probably true, but don’t worry. That won’t happen, no matter how often I or any other radio-pushers recommend. 🙂
I don’t mean to sensationalize radios. They’re no panacea. We know that in the days of yore (e.g. before the 1990s), people were indeed able to survive without cell phones or radios, even if the absence of a texting, selfie-snapping, web-surfing smartphone is unimaginable for some folks. Regardless, if you have a serious need to keep in touch with someone no matter what, definitely consider a radio for your backup plan.
Here’s another opinion, from the Seattle Times Article referenced below:
“Kyle Moore, public-information officer for the Seattle Fire Department, said he’s always getting laughed at for using an ‘old-school pager.’ But he gets the last laugh knowing his device will respond in an emergency. ‘If the cellphone towers go down, this pager works,’ Moore said.”
Personally, while a pager is a radio of sorts, I’d rather have a ham radio, and some (e.g. Yaesu VX-3R) are about the size of a pager (if you remove the antenna). Just sayin’.
For more details, see links to the parade and bridge outage articles below.
About halfway down the article, you’ll see: “Daryl Hamburg, manager of operations for Dike District 12, said cell phones are not working at the moment except for texts. Hamburg said people are everywhere.”
I have good news and bad news. Let’s start with the bad news. You’ll have a very difficult time finding eXRS radios because TriSquare has apparently decided to stop manufacturing them. Here’s one reference to that effect (even though as of publication, their website is still up). Apparently my recommendation didn’t go viral and significantly boost their revenue .
Motorola DTR650 FHSS handheld radio, image from www.motorola.com
Now for the good news. Frequency-hopping spread-spectrum (FHSS) radios are still available for general, unlicensed use! (Reminder: FHSS radios switch frequencies multiple times per second and only transmit for a fraction of a second at a time, making it impossible to intercept without very expensive, specialized equipment, which I assume that only three-letter agencies and military units have.)
A Better FHSS Option?
Motorola is producing the DTR650, the latest in its line of FHSS radios (including the DTR410 and DTR550). This is a good thing. Motorola generally makes solid radio equipment, and the DTR650 meets various military specifications (810 C, 810 D, 810 E, 810 F) for blowing rain, salt fog, vibration, blowing dust, shock and temperature. They appear to be much more durable than the TriSquare radios. You can see the DTR650 specifications here.
Additionally, they have many accessories available, including various earpieces, antennas, chargers, etc. And since this appears to be the latest in a line of radios, there will presumably be improvements to the product line and warranty or technical support available long into the future.
It isn’t all roses, however. I’m finding these radios for sale in the $200-250 range, per radio. That’s quite a bit more than the eXRS models, but depending on your budget and communication needs, these may fit the bill.
I haven’t used these radios yet, but I’m definitely interested in doing a hands-on evaluation. Now if I could convince Motorola to ship me a pair to evaluate…
Which ham radio books would you like to see reviewed?
Hi Readers,
When I started getting into amateur radio, it seemed like there were a *lot* of ham radio books that I needed to be reading. It didn’t take long for me to realize that there aren’t really that many, and definitely not many new ones, aside from yearly revisions of various handbooks. In fact, after authoring my third book with a ham radio focus, I am probably one of the more prolific authors in this area.
However, new books come out occasionally, and while I’m always interested in learning more, I don’t always purchase or otherwise get a chance to read them. But I will do that for you! 🙂
Before I ask, I guess it’s worth revisiting some good places to purchase amateur radio communication-focused books. You have multiple options, and maybe even a local “brick annd mortar” store that will let you look at a book before purchasing, especially Ham Radio Outlet, which has several stores across the country.
Ham Radio Outlet: http://www.hamradio.com/search2.cfm?sitem=Books. Unfortunately, their site isn’t the best way to browse many books at once (no book pictures until you click on each link), as compared to ARRL’s site. That said, their customer service is excellent and I’ve purchased many items from them – they’re great folks!
And of course, there’s Amazon.com, and you can see some of my reviewed and recommended books in the Bookstore page (see the “Bookstore” link at the top of this web page).
What Ham Radio Books do You Want to Learn More About?
In other words, what book(s) do you think would be useful for me to review on this site? I value your input, so please let me know! For example, are you interested in getting a better idea what’s in the ARRL Repeater Directory (aside from… frequencies and tones)? How about a book on low power communications? Do you have a preference?
Of course, there’s always the option to simply write another book. I just finished the sequel to ‘The Road Home”, which is titled “The Day After” – it’s another radio-focused adventure, with non-fiction endnotes. But that’s fiction, and I’m not sure how often people who come to a site like this are actually interested in fiction, versus the down and dirty reference material that comprises the overwhelming majority of amateur radio literature.
There’s no reason I couldn’t write another non-fiction book. If you’ve seen my book “Personal Emergency Communications“, then you’ll have a good idea of the level of depth I prefer. I’m not an electrical engineer don’t feel compelled to do a lot more studying in that area at the moment. However I do have a passion for providing information that less technical readers can learn from, even if the topic is somewhat technical. Is there a topic you think deserves a book? I’d love your feedback there too.
I left my phone at home the other day. I didn’t get a good night sleep the night before, and was so groggy in the morning, I simply didn’t remember to take it with me. This happens once every few years. But instead of turning around to go back home and get it, I decided to make my first meeting on time and to see what it would be like navigating my day without constant email, text messages, phone calls, games, GPS, Twitter, Facebook and RSS feeds… you get the picture.
What If…?
My first thought was “What if I need to call home?” Then I remembered I had a desk phone (:-0), and gave my wife a quick call. Win! Now she knows my office number. In the last decade or so, I guess she’s never needed to call it, since I always have my cell phone. Now she has a backup number for me, so that’s good. But it’s not the most interesting part.
I also thought “But what if it’s an emergency and I’m not at my desk?” Then I thought about our personal emergency communication plan, and realized that the only way it was going to get used is if we both have the same emergency at the same time, e.g. something catastrophic like an earthquake. I didn’t think to ask her to turn a radio on, set to monitor throughout the day. Our plan clearly needs more tweaking. Since my commute isn’t that long, it’s really not a big deal. And if you remember back in the <gasp> 20th century, there was a time when nobody had a cell phone, and somehow we survived… But that’s still not the most interesting part.
Oblivious
The most interesting part of my day was what I noticed about the people around me.
Stop looking at me.
I work at a high-tech company where most employees have smartphones, the kind that consume lots of data and have many, nifty apps, in addition to being used for work and personal email. Can you guess what it looks like on an elevator, walking between buildings, or in the cafeteria? The thing I noticed most is how many people were oblivious to the world around them because they were heads-down, focused on their phones! Even driving, when waiting at a light, I looked around more than before, and saw many drivers taking a break to surf the Internet or send a text message in the seconds between lights. Of course, it wasn’t everyone. But a lot of people were heads-down. Take a good look around, next time you’re in a crowd, or waiting at a light. What do you see?
How Aware Are You?
And I lied. While that was definitely interesting and got me thinking, it wasn’t the very most interesting part. The most interesting part was… you guessed it: all about me. I hadn’t noticed this before because my head was always buried in my phone! Fail. That’s what you call “inadequate situational awareness” or “condition white” for the more martial among you. If you leave your phone at home for a day and suddenly you notice some big, different things, you definitely weren’t paying enough attention before. Just like me. So don’t fail. Pay attention.
Set down your whiz-bang phone, tablet, iPod, or other gadget for a minute and look around. You may notice something you never noticed before.
Imagine my surprise when I saw that our local government upped the ante in their disaster prep recommendations! What appears to be a loose coalition of Emergency Management Offices here in Western Washington (“Make it Through” – see link below) is making more extensive recommendations than you’ll see at the federal level.
Good advice from FEMA, but you can do better!
No longer are they recommending the minimal three days of food, water, and other emergency supplies. They’ve more than doubled the recommendation to seven days (actually “seven to ten”). Good for them!
But that’s not all. They’ve altered the FEMA guidance of “Make a plan, build a kit, be informed.” And it’s a critical twist I wholeheartedly endorse. If you go to http://makeitthrough.org/, you’ll see this guidance:
Make a plan
Build a kit
Help each other(versus FEMA’s “be informed”)
Assuming that people will be informed anyway (if they have a radio in their kit and pay attention otherwise), helping each other is far more important.
New and improved advice!
In many disaster scenarios, most people won’t have access to the standard array of government emergency services, so we must assume that police, fire, medical and other services will not be available. So who will be available? Each other.
And how can you become more useful, or help others become more self-sufficient?
One great way is to run a “Map Your Neighborhood” program or something similar, depending on what resources are available in your area. (If you’re not sure how to do this, learn how here.) If you don’t know your neighbors, you should probably get out and say hello. This program is a great excuse to meet people you should already know (and will help you learn other important information…).
And you can’t go wrong by taking Red Cross First Aid and CPR classes, or better yet, one of their First Responder courses.
Back to the latest, greatest government guidance. As it turns out, unfortunately, their “Make a family emergency communication plan” is the typical “write down some phone numbers, including an out-of-area contact” advice. It’s not bad advice, but you can do far better with very little effort. Check out www.emergencycommunicationsblog.com for more details, or if you want the best communications-focused, disaster prep resource out there, get my book!On sale now at Amazon.com :-).
I’m happy to announce that my next book is now available! If you have family, friends or anyone else you care about and want to be prepared to weather the next power outage or even a natural disaster, Personal Emergency Communications is a must-read.
Personal Emergency Communications – get your copy now!
Written for the layman (no radio interest or expertise required!), I’ll walk you through the technology, the equipment you’ll need, and how you can make your own realistic, simple emergency communication plan, far more advanced and useful than the insufficient “have an out-of-area-contact” plan you’ve probably heard before.
I wrote this book for my friends and family, and for anyone who *isn’t* interested in radios at all, but who is interested in taking care of loved ones when the chips are down. Have you have ever wondered “What will I do if my cell phone, land-line phone, and the Internet don’t work?” or “How will I call [insert important people here] to know they’re safe?” Or do you only wonder now, since I asked the question? 🙂 In any case, this book is for you!
Here are comments from Ward Silver, author of “Two-Way Radios and Scanners for Dummies” and “Ham Radio for Dummies”:
This is a very useful book for someone interested in communicating in a disaster or emergency but who has little or no experience with using radio equipment… I like the book’s approach of “you can do this” and how it emphasizes thinking about what you want to accomplish, having several backup plans, and the need to practice. Andrew manages to explain the basics of different radio technologies while keeping a lot of the technical details from obscuring the basic points. To be sure…to get the most out of your radio and communicate effectively you’ll need to learn some of the technology but not all at once right at the beginning. The sections on personal prep and “go kits” is welcome and can’t be repeated enough. Going though his provided templates will help anyone think about planning and their personal circumstances which is a good thing – not enough people do it and are then unprepared. He provides on-line resources that will help the reader learn more about whatever technology they wind up deciding to use. This keeps the book from becoming an encyclopedia and makes it easy to read all the way through instead of getting sidetracked by details.
Give it a read and be much better prepared for an emergency.
Is sleeping part of your disaster plan? I’ll bet it’s not. Of course we can’t predict when we’ll be able to sleep in a life-or-death or otherwise high-stress situation. But we will all need to sleep eventually, so how will you ensure you’re able to get a minimum amount of rest?
Effects of Sleep Deprivation
We all know what happens if you don’t get enough sleep. At first, you get a little… stupid. You can’t do simple things as well as before. Your short-term memory starts to fail. You get clumsy and irritable. And you start making mistakes. Worst case, you make big mistakes. Long-term sleep deprivation is even worse, eventually resulting in mental breakdown and worse.
What do you think will happen after a day or two in a long-term emergency or disaster situation? Not only will you have a lot of additional problems to stress over, you will probably also have a compromised sleeping situation. Why? Maybe it’s because the rest of your family is not sleeping regularly, your home is damaged, you have unexpected guests, loud disturbances (sirens, gunfire, voices dogs barking) in your area, or any of the many other things that could make it difficult to sleep. And that’s not assuming you’re pulling a night watch shift because looters are busy in your neighborhood.
Sooner or later, you must sleep!
We can make one assumption safely, however. You must eventually sleep. If you don’t proactively decide when to sleep, you will fall asleep at the worst possible time, according to Murphy’s Law. This is one of the most troubling scenarios to the single person in an unsafe environment, so if that’s your scenario, you better find a place to hole up. But for most of us, we will have someone in the area we can trust to not plunder (or worse) while we sleep. And in that case, the goal will be at least a few (ideally several) hours of rejuvenating, uninterrupted unconsciousness.
Tips For Quality Sleep
Darkness will help. When I was in Army basic training, I was sleep-deprived like everyone else. One day on KP (Kitchen Patrol), things slowed down temporarily at the pots and pans station where I had been busy scrubbing bacon grease and other gunk off of large trays, and I took the opportunity to crawl under the sink, curl up and crash out for about an hour. It wasn’t as nice as a full night’s sleep, but it was better than nothing. And since I was so tired, I didn’t even notice that the bricks I lay on were hard, cold and damp, and that the pans getting cleaned in the stainless steel sink above me were clanging loudly. Darkness is all I needed at that point.
Another option that may help in your situation is a simple sleeping mask, especially if you’ve used one before and aren’t going to be distracted by something touching your eye area as you sleep. I remember many times after a 10:00 PM to 6:00 AM night shift, when I’d get home and put a large (and clean) sock over my eyes to help block out the light as I drifted away. A sleeping mask would have stayed on better.
A quiet environment will certainly help get you an extended chunk of sleep time. A surefire way to help with that: earplugs. I carry a pair in my backpack, so they’re around every time I travel. It’s not often I encounter unexpected, continuous noise, so that’s not my concern. But being able to shut out the world and sleep is a big deal. They’re small, inexpensive, and easy to find in bulk. Make sure you find a brand that fits comfortably, or you may wake up too early because they fell out, or because your ears are getting sore.
Along those lines, a cool environment will probably help too. Although it’s probably not likely you’ll have all of your common climate control options available in a real disaster, if you have the option to sleep in an environment that’s about 68 degrees F, you’ll probably sleep better than at 75 or 55 degrees.
Take some ibuprofen (Advil) or acetaminophen (Tylenol). Not the the “PM” kind (like Tylenol PM), which contain antihistamines (which can cause undesirable side effects, especially if used repeatedly). All the little aches and pains you picked up during the day will be relieved and allow you to rest more comfortably. They might not seem significant as you doze off, but they may prevent you from really relaxing for an extended time.
If You Want to Sleep, Avoid These:
Alcohol may help you feel drowsy, but after you process the alcohol, you will probably go through an alert phase, and unless you’re really drunk (which is not a good idea, because drunkenness and subsequent hangover are also not helpful in an emergency situation), you’ll probably wake up long before you get as much rest as you need.
As stated above, antihistamines like Tylenol PM, while they may cause drowsiness, aren’t a great approach. Other sleeping medications (unless prescribed) probably should be considered only as a last resort.
Caffeine (coffee, tea, soda, “NoDoz”, etc.) consumed within a couple hours of when you need to sleep will decrease your sleep quality, if you’re able to get to sleep at all. The same applies for nicotine in cigarettes, depending on how you’re addicted (since it relaxes at some times and stimulates at others).
What Can You Do Now, and What Can You Stock Up On?
Ensuring you are able to get to sleep after a disaster, short-term emergency, or even a stressful day is critical for your mental and physical well-being. Consider these options as part of your planning.
Be healthy and fit now. Healthy people who exercise regularly sleep better than those who don’t. Fitness is money in the bank.
Get enough sleep now, so you’re not in a deficit when the major stress hits. Get it while the going is good!
Buy some earplugs, a sleeping mask, and a bottle of ibuprofen or acetaminophen (which you should already have).
Test your sleeping mask and test your earplugs at night. See if you need to try something different. Don’t wait until you’re stressed out to test your plan.
If you’re concerned your bedroom may not be available when you need it, get a cot and try sleeping on it one night. If you don’t lose your bedroom, a guest who gets to use it will thank you profusely.
We all think about shelter, food, water, and other “basics” in a disaster preparedness context, but also make sure you give some thought to how you’ll maintain your sanity! You can thank me later. 🙂
Thanks for subscribing to PreparedBlog.com. I think you’ll find the content and updates useful!
*NEW* Updated 5/20/2012
Updated, interactive personal emcomm plan template - enjoy!
I just added a Microsoft Word document for your use. It has interactive dropdowns and you can edit it directly on your computer. If you’ve been itching to make a pretty, typed-up plan, now you can! You can download it here: Updated Template – Word format (.docx format – requires Microsoft Word 2007 or newer). Please let me know what you think of it!
The PDF version is still available below. Next, I’ll get to work on an interactive PDF.
————————————————————
This is the template I used at various conferences, walking through the Q&A and plan details with the audience. Using Personal Emergency Communications as your guide, you can fill this out yourself and save the cost of a conference and travel. 🙂
What is the most important aspect of disaster preparedness?
What is the easiest thing I can do to be better prepared for disaster?
What is the least expensive thing I can do to be better prepared for disaster?
These and other interesting practical prepping questions and answers await you below. Enjoy!
Dr. Bradley, if there was a single, simple preparedness message you wanted people to understand, what would it be?
My message would be to keep your preparations simple and effective. Avoid getting caught up in hype or paranoia. Start with a simple threat assessment, identifying the disasters that you are most worried about. This assessment might be drive by likelihood, severity, or special vulnerabilities. Once you have identified the threats that are of greatest concern, determined their impacts (e.g., food shortages, loss of electricity, lack of medical care, etc.). With the impacts clearly understood, it then becomes possible to take steps to mitigate their effect on your family. For example, if you’re worried about losing electrical power during a hurricane, then equipping your home with a backup system (such as a generator or battery/inverter system) would be near the top of your list of preparations. By working through this logical process of threat assessment, impact identification, and targeted preparations, you can effectively prepare your family for a wide range of disasters.
What inspired you to write your books?
One of the best disaster prep books currently available.
I’ve always been interested in disaster preparedness and wilderness survival. When I was a child, my father was a big survival advocate. I remember sitting around as a family studying maps of probable nuclear blast zones and discussing where we would retreat to. What really drove me to action, however, were the terrorist attacks of 9/11. As I watched the Twin Towers burn, I decided that my family was terribly underprepared for the kinds of dangers that we might face. This led down a long road of reading every book on the market, taking appropriate training, assessing my own family’s needs and preparations, and then taking concrete steps to get ready. It also motivated me to put my research together into a handbook that I hope others will find useful.
What is the most important aspect of disaster preparedness?
The most important aspect is to consider the needs of your entire family. Too many people forget about their family’s special needs, whether they are the needs of children, pets, an elderly parent, or someone with a medical condition. A disaster preparedness plan should be tailored to each family. A family with five kids that lives in rural Nebraska is very different than a retired couple living in a high rise apartment in downtown Los Angeles. There is no one right answer that fits everyone.
How can I explain to my wife, husband, parents, kids, or friends why disaster preparedness is important? What is the easiest way to give information to others without sounding crazy, “doom & gloom”, or paranoid?
I find that it’s easier than most people think to invite others to join the cause. The hard fact is that we all want to survive. When people see a viable threat, they pay attention. A clear, level-headed proposition to get better prepared is usually met with some understanding. Nearly all of us have been affected (or know someone affected) by widespread disasters. That often serves as a good jumping off point for forming a disaster preparedness network.
I personally think that there’s a movement underway in the US (and perhaps globally) to get better prepared. It’s likely due to the unprecedented number of disasters that occurred in 2011. Consider that in 2011, there was over 265 billion dollars worth of damages globally! Just within the US, there were nine disasters that caused at least 1 billion dollars of damage, not to mention the horrific loss of life from tornadoes.
What is the easiest thing I can do to be better prepared?
I tell people to start by storing 30 days of food and 14 days of water. Next would be to set up a backup heating system (if appropriate to the climate). These simple steps can help families get through many commonplace disasters.
What is the least expensive thing I can do to be better prepared?
Simply to start paying attention. My motto is Stay Alert = Stay Alive! Getting a weather radio is a good example of a paying closer attention to the threats around you.
What is the most importanttraining I can get for disaster preparedness?
I’d start with first aid training. Everyone should know life-saving first aid, whether it be how to stop bleeding, recognize the symptoms of a stroke, or administer CPR. CERT training, firearms instruction, and HAM radio licensing are also valuable.
Concerning disaster preparedness, what is our biggest cultural weakness in the US?
Like many parts of the world, we’ve grown fat, dumb, and happy. Many people are complacent and live under an imaginary umbrella of protection that our government provides. I feel that we need to return to our roots and recognize our own responsibility for our family’s safety. More grit, less handouts.
What is our biggest infrastructure weakness in the US?
Arguably, it’s the electrical power infrastructure. The electrical grid serves as the lifeblood for nearly every other infrastructure (i.e., food harvesting and distribution, water processing and distribution, banking, transportation, telecommunications, petroleum and natural gas, emergency services, and government). If it goes down, everything else quickly fails. By all accounts the power grid is old and prone to systemic failure. Consider the widespread and lasting effects of a long term failure – such as from an EMP attack or solar storm.
What’s your next book about?
As you know, I currently have two books out. The Handbook to Practical Disaster Preparedness for the Family is a comprehensive book that helps individuals and families understand the process of getting better prepared. The newest book that I have out is Disaster Preparedness for EMP Attacks and Solar Storms. As the title would imply, it hopes to address these two very important threats by analyzing the likelihood and ramifications of the events. It also outlines how individuals can prepare and protect themselves from these dangers. My next book will likely be an Advanced Prepper’s Manual, discussing more advanced topics when preparing for truly world-changing events.
Can you tell us a little more about yourself, a quick bio?
Dr. Arthur Bradley is an Army veteran, father of four, martial arts expert, and dedicated homeschooler. He is active in volunteer youth organizations, including the Boy and Girl Scouts of America. He holds a doctorate in engineering from Auburn University and currently works as a senior engineer for NASA. Having lived all across the United States, Dr. Bradley writes from personal experience about preparing for a wide variety of disasters, including earthquakes, tornados, hurricanes, floods, house fires, and massive snowstorms. He prescribes to the philosophy that preparedness should always be motivated by love and concern, never by fear and paranoia. His practical approach to family preparedness has received widespread praise from individuals, emergency preparedness experts, and religious organizations.
Thanks for your time, and illuminating comments, Dr. Bradley!
Do you have the “recommended” three days of food and water set aside for an emergency or disaster? Is your plan to go to a government shelter after a disaster, even if you have your own shelter or your home is still habitable? If so, you should think again.
You can find recommendations on emergency food storage from the Red Cross, your local government, disaster preparedness gurus, and many others, and the recommendation looks like this: “Set aside three days of food and water in case of a disaster.”
Of course, it’s not difficult to put this much food aside, and it’s definitely not a bad thing to do. Many people already have more than three days of food in their cupboards and pantries (although the usual recommendation is to have this three days of emergency food set aside in a separate location, ideally in a box that’s easy to move, so that you can take it with you if you need to evacuate). Please note one more issue that is occasionally addressed: You can take that box of food and (since it’s portable) simply give it to someone else who needs it (e.g., an unprepared neighbor), assuming you have enough yourself.
But is three days of food and water for an emergency a realistic amount for you and your family? I can’t answer for you and your family, but I’ll give you the answer for me and mine: “No!” Why do I think three days of reserve food and water insufficient? When I’ve heard this recommendation in the past, the logic behind it (which I only recently heard called out explicitly) is that three days of food will give you enough buffer to get by until you are able to get to a government shelter. What is your plan in a serious emergency or natural disaster? Do you not have a plan? Uh oh! Let’s back-track for just a moment. While this article isn’t about creating a full disaster plan, let’s look quickly at the angle. If nothing else, ask yourself these questions:
If the power goes out for over a week (since power outage is the result of most disasters, e.g. earthquake, hurricane, nuclear reactor meltdown, regional flooding, tornado, etc.), what will you [and family, friends, as applicable] do? Is your goal to go stay at home (assuming it’s habitable) or is your plan to go to a government shelter? By the way, if you don’t have a plan for more than a couple days of food and water, your default plan is to have the government take care of you!
If your local gov’t is your plan, let’s ask one more question: Are you confident that within three days, your local government will have a clean, safe, stocked shelter ready for you and your family (but not pets – not allowed) to move into? Once you’ve given at least a moment’s thought, let’s focus more on self-sufficiency and ask the next question…
How long do you want to be able to comfortably eat and drink (more on water storage in a separate article) if you can’t leave your home?
Mountain House is a high-quality, easy-to-prepare and tasty option for bulk, freeze-dried food storage.
Three days is a minimum, and of course you should have that ready to use or give away. But let’s look at some better, convenient options. Quickly, let’s review the types of food you can store. Of course, fresh food isn’t an option for a power-out situation, unless it’s coming from a local farm or garden.
Bagged/boxed food: it can often last up to a year or more, and needs to be regularly rotated into your everyday food stores.
Canned food: it can also last a year or more, and needs to be rotated in order to prevent needing to throw away expired food each year.
Dehydrated food: Dehydrated fruits & some other products can last up to a few years.
Freeze-dried food: This is my favorite option, though more expensive than the next option. You can get canned or bagged freeze-dried food that will last 20-30 years, and if you prefer, you can get meals that only need to add water, vs. raw ingredients (next option), which will require more preparation.
Raw foods: Wheat, rice, beans, corn, and other grains are easy and relatively inexpensive to store in cans or larger containers, and they can last 20-30 years, and in some cases longer. Preparation is more labor-intensive (e.g. grinding wheat), resource-intensive (e.g. baking bread), and time-consuming (e.g, soaking beans overnight vs. simply adding water to freeze-dried food).
The easy way to set aside one, two, or three weeks (which should be the minimum, in my opinion) worth of food is to regularly set aside a small amount of canned and boxed food (even if it’s just one can or box), every time you come back from the grocery store. If you don’t have a big budget to set aside food right now, this approach allows you to gradually grow your emergency food supply, maybe only an extra day of reserve at a time (or even less), until you reach your goal.
Wise brand has some great advantages: the portions are individually-wrapped (whereas an opened can may go stale/bad if not used soon), and the storage is quite compact. There are 84 servings in this bucket, with 10 different types of entrees and break fast options. This single bucket may be your (individual) 28-day backup food supply. It's that simple!
Another way, if you have a little more cash set aside, is to buy free-dried. In my opinion, this is the easiest option for long-term, “buy-and-forget” emergency food storage. You can buy a one-week, one-month, or even one-year (if you have the $, space, and that much concern) supply, store it and be done with it for the next 20-25 years. That is convenient! Freeze-dried food is my favorite option for those reasons:
Long term storage: Canned, freeze-dried food is usually good for 25 years, sometimes longer.
Easy to prepare: All you need to do is add hot water (or even cold water if you want to wait longer for it to reconstitute), wait a couple minutes and eat a prepared entree (e.g., spaghetti and meat sauce, beef Stroganoff, chicken teriyaki).
Easy to organize: Take your bucket or box of #10 cans and stick them on a dry shelf. Mark the date on them and come back every couple years to make sure they haven’t been damaged. No rotating necessary. If you store canned/boxed food, you’ll need to rotate (still not a big deal). And if you store canned, raw ingredients, you’ll need to make sure you’re storing enough of the components to make a meal later. E.g., a ton of wheat will go a long way, but you’ll be sick (figuratively and possibly literally, depending on your innards) of eating hot wheat berries for breakfast and bread for lunch after about one day. You’ll need a wider variety of ingredients.
A downside, at least at first glance, is price. However, give it a little thought anyway. Storing a significant quantity of freeze-dried will probably look quite a bit more expensive at first glance, but when you compare to a can or bucket of wheat, rice, beans, spices, etc. and factor in the cooking time and facilities necessary to make them edible, the additional water and other ingredients you’ll need to consider, weight (if you ever need to move your food), etc., the option that seems less expensive now may feel much more expensive later when you need to use those supplies.
Note: Canned freeze-dried food will last far longer than mylar pouches by themselves (with the exception of the Wise foods mylar bags that are sealed again inside a plastic bucket). The Mountain House, Alpine Air, or other brand mylar-bag-packed food you can buy at your local sporting goods store usually lasts five to seven years, whereas the same meal in a #10 can (the usual size, typically Mountain House brand, but there are others) will usually last 20-25 years.
Of course, three days of food is a nice start, but regardless of how you want to store emergency food, consider at least three weeks. It’s easy!
If you haven’t read my first article on Setting up and Running a Map Your Neighborhood Program, you should read it first, here.
The quick version: the Map Your Neighborhood is a program designed to help neighborhoods prepare for disasters, with a specific curriculum and workshop materials. I tracked down and reviewed materials, invited neighbors, offered dessert, and…
After all of the preparing I did, the program went just fine. Most neighbors showed up on time, and some even brought their own chairs (as I had requested). And even though we had prepared pie and ice cream for everyone, people brought more desserts anyway! We had a lot left over, and nobody left hungry. How can you go wrong with extra dessert?
Map Your Neighborhood participant handout and American Red Cross preparedness materials
We walked through the Map Your Neighborhood standard content, which was quick and easy, and had a little bit of Q&A along the way. We briefly walked through additional Red Cross content I had brought. I demonstrated a water and gas shutoff wrench, showed some food storage options, showed a water can when talking about water storage, etc. I also mentioned some of the content in the CERT class I was taking at the time. Unsurprisingly, there was some significant overlap. And given my background, I probably spent a little extra time on emergency communications. You can expect an article later if I am able to set up the emergency communication plan I have in mind for the neighborhood. 🙂
What went well?
One neighbor brought their three teenagers, and they were all engaged. Wow! I didn’t expect any young folks to be interested, but I’ll take it.
Everyone cared about the content, and had good questions.
Everyone followed up with my request for additional contact info, so that I was able to prepare a useful map.
Everyone said “OK” when I asked (and you must ask) if I could share our contact information
We finished quickly, less than two hours. If I recall correctly, we were done in about 1.5 hours, which is very quick for all of this content.
What could have gone better? We had a couple of false starts as people trickled in, but I guess that is to be expected. Also, I didn’t use the training DVD. Why not? Personally, I thought the program went much quicker without it, and not taking a lot of time was one of my goals. I wouldn’t recommend that for everyone, however. One of the benefits of the DVD is that the training is standardized — everyone sees the same material.
Also, two neighbors couldn’t make it, and I could have tried to reschedule again, but I was getting tired of trying to pin down a date that would have worked for everyone. I did drop off the materials with both neighbors afterward, and they did provide me with contact info for our map (see below), so that ended up OK.
About a week later (it should not have taken that long, but I was busy!), I sent out the map, which I put together as a PDF. It looks something like the picture below.
You’ll note that I asked for certain key pieces of information:
Names of everyone living in the residence, even if part-time
Names and types of pets
Land-line and cell phone numbers for everyone
Email addresses for everyone
What I didn’t ask for: Emergency contact number, especially out of area. I’ve been thinking about this and think it’s a good idea, although I’m a little concerned that people might find the request invasive. Maybe I’ll ask what people think when we all get together next.
Sample Map Your Neighborhood map
You can see how it turned out. It looks a lot like the sample I made, which you can see to your right. Here’s how you can make your own map:
Go to Bing or Google maps, find your location, and zoom in as far as you can.
Use the “Snipping Tool” (in Windows, or whatever for Mac/Linux) to capture the view you prefer
Copy it
Paste it into your desktop publishing application. I used Microsoft Publisher.
Add text boxes with contact info, and lines that point to houses
Save as PDF and send out to your neighbors (but you’re not done yet!)
Get corrections (guaranteed to be a few), make changes, and send out again
Follow up by handing out paper printouts to each neighbor (they may not have a printer or may forget to print it out)
What I didn’t put on the map: Resources, like chainsaws or generators. It seemed like it would be more work and I was running out of room on our map, although I do have notes from the meeting. The good news is that we neighbors all know each other well enough now, and the group is small enough that I think we would all be relatively comfortable asking for help from the guy who’s good at plumbing, construction, first aid, etc.
What’s next? We had a neighbor move away just a couple weeks ago. When that house is occupied again, I’ll introduce myself, try to get a read on the new neighbors, see if they’re interested in reading some disaster preparedness materials, and when it feels comfortable, I’ll ask them for some contact info. If the other neighbors are sufficiently comfortable with the new neighbors (or trust my judgment), we can share all of our contact info. I won’t give anyone’s contact info to anyone else without permission.
Another thing I’d like to do when the weather is better is to have a simple “block party” type of gathering – a pot-luck or barbecue or whatever. Even though we’re neighbors and even though we’ve met each other, had conversations, and even shared some stories, there is still a lot of opportunity to get to know each other better and ideally increase our mutual trust and comfort level. This is what I think will make the biggest difference in a pinch.
I hope you found this useful. If you have any questions or comments, please post below!
Emergency Power for Radio Communications is one of the best books I’ve seen so far on the topic of creating reliable, portable back-up power solutions. Even though the focus of this book is on radio comms, the solutions Michael Bryce WB8VGE describes are useful for just about any of your power needs – recharging other communications devices, lighting, etc.
Whether you’re a radio person, looking g at off-grid power solutions for your cabin, or interested in alternate power sources for any other reason, like a winter storm, this book is jam-packed with very useful information. Even though the title says “for Radio Communications”, don’t let that fool you. This book is for anyone who needs power in an emergency. It could have been titled “Emergency Power Solutions for Any Reason” (but that wouldn’t have sounded as good, I guess).
Let’s quickly look over what’s covered, with a little editorializing on my part (that’s why you’re reading, right? :-)).
Hey, I am in the Dark: This chapter is about lighting. You may think that talking about batteries or generators or radios would come first, but if you think about it, if you have no power, and it’s not daytime, light is critical! This is a good, basic review of emergency lighting options.
Solar Power: Basics of solar panels, types, how to calculate $/Watt, power ratings, making your own panels, mounting, safety, dealing with wind, and more. This is a great intro to solar power basics.
Charge Controllers for Photovoltaic Systems: It’s not often you see a set of solar panels with no charge controllers. All the energy coming from those panels needs to be managed somehow, and you’ll learn about how they work, different types, what you will need for your setup, and more.
Generators: Gas, Wind, and Water: This is interesting. I’ve never seen anyone lump these technologies together in one section before. In either case, the author does a solid review of the different types and technologies that exist for gas generators. Even if you only need to power part of your house with a generator when the power is out, this book will be worth the purchase just for this section. I learned a lot here. He also briefly describes some wind and water power basics. If you are planning on setting up a permanent off-grid wind or micro-hydro power solution, this won’t be enough info, but will get you started.
Load Sizing: How much equipment do you need to run and how much power will it consume? If you don’t know, you could be in for a nasty surprise when you run out of power, the sun has just set, and your emergency power solution happens to be solar panels and batteries. This section will help you calculate what you need.
Holding your Volts: Battery Systems and Storage: All about batteries. Types are covered – NiCad, NiMH, Lithium-ion, flooded lead-acid, AGM, and gel-cell . More details of voltage, temperature, charging, amp-hours, maintenance, setting up a battery bank, safety, and examples of what *not* to do are also covered. And there are a lot of good pictures. Another fantastic resource for anyone who needs to use battery power.
Systems for Emergency Power: This is where it all comes together – the alternate power source, power management and storage as needed.
Inverters: If you need AC power and have a battery, you will need an inverter. But what kind? How much power should it produce? How big of a batter would you need to produce enough AC? Do you need a pure sine wave? Does it need to tie to the power grid? These questions and many more answered here.
Station Instrumentation: You will learn various ways to measure and monitor your power supply.
Safety: Of course, electricity can be dangerous for a few reasons. This is definitely worth reviewing. To his credit, the author discusses safety all through the other sections too.
Emergency Practices: One thing I like about this chapter is that the author covers general emergency preparedness well, discussing an overall plan, budget, light, communications (of course), food and water, health & sanitation, pets, firearms, and getting others involved. For a short chapter, it is dense with good advice.
There are a few appendices at the end, also content-rich. All in all, this book is a treasure trove of emergency power information, and better than most books I’ve seen on the topic. Enjoy!
Aside from your brain, one of the key every-day carry tools is the popular folding knife. Most of us can use one effectively to open boxes and bags of chips, but how can you use a knife for self-defense purposes? Take a course like “Defensive Folding Knife” – then you’ll know.
Do you carry a folding knife? Have you thought about carrying a folding knife but just aren’t ready yet? And why do/would you carry one?
If your reasoning includes self-defense, in a very bad situation, keep reading, because I learned some things you should know too, at the Defensive Folding Knife course at Insights Training in Bellevue, WA.
A few basics for those of you who aren’t sure about why you’d carry a defensive knife (credit to Ralph Mroz for his article in Tactical Knives magazine) in the first place:
Anyone can use one, old or young, fat or skinny, weak or strong, man or woman
A knife is easy to use very quickly
A knife is very easy to carry – pocket, waistband, etc. (more on that below)
A knife is legal to carry almost everywhere (research your local laws before you carry!)
Depending on where you live, it may not be legal to carry a gun, and for you a knife may be the next best thing
If you travel, a knife is relatively convenient, and legal in many more places, especially internationally (do even more research here – some countries carry stiff penalties for silly things)
As you read further, you’ll learn even more about why a knife can be very handy in a pinch.
Let’s start with a couple things: 1) Why I took the course and 2) Who are these Insights folks?
I took this course for a couple reasons. I took a similar course previously several years ago, from Eric Remmen. It was good stuff. When I saw one of the InSights Training Center flyers at the local gun store, it looked like similar curriculum, already knowing that their training would be very high quality, I decided to give it a go. That’s one reason – because I like to learn, am interested in self-defense stuff, and I knew this instruction would be good. How good? Here are the bios for a couple of their instructors:
Greg M. Hamilton, Chief Instructor: “Greg is the Founder and Chief Instructor for InSights. He is internationally recognized as one of the best firearms and tactics instructors in the world. He is a veteran of the US Army Rangers and Special Forces, and is certified by the Army as a Close Quarters Combat Instructor and Anti-Terrorism Instructor.” And two more paragraphs with more details…
John Holschen: “John Holschen is a frequent guest instructor with InSights. John served for over 20 years in the Special Operations and Intelligence branches of the U.S. Army. He is a former US Army Special Forces Weapons Sergeant and Special Forces Medic. John taught at the JFK Special Warfare School and was the Senior Hand to Hand Combat Instructor/Master Instructor for 1st Special Forces Group.” And two more paragraphs with more details…
They are bona fide bad-asses, and at the same time, easy-going (at least with this civilian crowd), excellent teachers. How could I help but learn a lot?
The other reason for taking the course is that I often carry a folding knife, and use it to open boxes, bags, bubble-packed stuff, and the hundred other things that seem to come up regularly when you have such a tool available. The techniques used to open & cut stuff in this context are relatively easy to acquire intuitively. However, when it comes to using a knife for self-defense purposes, critical behaviors and actions are not so intuitive for many (even for some martial artists, who are taught some wacky concepts sometimes). I thought I had a good foundation with what I learned in my previous course, but wanted to be a little more sure, since I would be relying on this training to potentially save my life or the life of a loved one. I wanted to be able to use this tool to protect myself, at least somewhat effectively.
So I showed up at about 8:00 A.M., ready to go, wondering what I’d find. You may be a a little surprised. While there were a few more men than women, the class was not full of ex-military, muscle-bound, buzz-cut-sporting, tough guys itching to fight, but “regular folks”, from the overweight woman in her late 60’s and her 30-something daughter to the couple in their 20’s who wanted to take better care of each other. And my wife. I dragged her along. She loves to learn too, and is generally a real trouper when it comes to indulging me. (Thanks Baby.) Essentially, it was a little cross-section of society. I wondered how they would be able to tailor their curriculum to fit this group, most of whom were not “fighting-fit”.
One of the wonderful things I learned about a simple folding knife in a life-or-death, self-defense scenario is that it can be used very effectively by weak and strong, tall and short, young and old, with devastating effects. And Insights set up the class so that anyone could take it. Kudos to whoever owns the training plan – it seemed to work well for everyone. Their fitness level didn’t matter much.
Let’s talk about what we learned. I’m not going to give you a minute-by-minute description, even though the course was sufficiently content-packed to do that. You’ll need to take the course yourself to get that level of content (and I recommend the course to anyone interested in taking care of him-/herself). We covered the following topics (and other stuff I don’t have room to include):
When to use deadly force
Color codes of awareness
Mental conditioning
Techniques/Skills
Equipment
You’ll notice something that our instructors didn’t actually call out in the class (that I recall). The listing above is generally covered in order of importance, from most to least important. For those of you who think having the super-cool knife is all you need to defend yourself in a life-or-death situation, you are dead wrong. You should know when it makes sense to use a knife, practically and legally, what your mindset should be, how you can avoid a dangerous situation and using a knife altogether, the basics of how to use the knife in a variety of situations, and lastly, some good knife options. All of the information leading up to which knife you want is much more important.
Again, this material will NOT replace taking this course or a similar course. THIS ARTICLE IS FOR INFORMATIONAL PURPOSES ONLY, and anything you decide to do with this information is at your own risk. Consult your doctor, lawyer, local law enforcement, law-books, etc. before you do anything with a knife where you live.
Let’s go over some things I learned.
1. When to use deadly force in self-defense
As I referenced above, you must know the laws in your city, state, province, and/or country. And aside from what your local laws allow, what’s covered in this course is only defensive in nature. Do your research – your and your family’s well-being (at least) could depend on it. You can’t defend your loved ones if you are in prison, and your opinion of what’s right and wrong may not matter to your local lawmakers, law enforcement & judges. According to many laws, the following conditions must exist before you can use deadly force (which you should also learn in any self-defense-related shooting course):
Ability – the attacker must be able to use deadly force against you (or someone else – the same applies to “you” below).
Opportunity – the attacker must have the opportunity to carry out the attack.
Jeopardy – the first two aren’t enough. The attacker must use the opportunity and ability to actually put your life in danger by doing something.
Preclusion – Bonus points! While this is not a legal requirement in most states, it may be a good idea nonetheless (and while you’re busy “precluding”, you may have extra time to call 911 and let the police show up. They get paid to risk their lives for stuff like this, and you can avoid the liability and probable civil lawsuit hassles). Essentially, it means that you try every other option to get out of that situation.
2. Color codes of awareness
Most firearms courses out there teach these color codes, or one of the few variations on them. Here is the quick version.
White: unaware – you should only be here when you are asleep
Yellow: relaxed and alert – you are aware of your surroundings
Orange: you are alert to a specific danger or potential danger
Red: a fight is imminent – you are in danger and ready to deal with it
Black: you are fighting – retreat is not an option, you are in danger and actively dealing with it
We spent a solid chunk of time on this material – what you see above is only a basic outline. Go learn this material and the accompanying scenarios from a pro.
3. Mental conditioning for self-defense
This was the most fascinating part of the course for me, and that’s saying a lot, because the whole course was fascinating! The instructor obviously knew what he was talking about, and the amount of information he had to offer made me feel like I was drinking from a fire-hose. This was all about psychology. But not the psychology you’d get from your textbook in Psych 101. Instead, this was the psychology of behavior on the street, in a bar, wherever you put alphas and betas. We discussed submissive vs. aggressive behavior, NLP (Neuro-Linguistic Programming), verbal and non-verbal communication. Here are some key pieces of info I remember. (And there was a lot more content we covered that I’m not going into. This part of the course was well worth the entire cost.)
If you look like food, you should expect to get eaten.
Aggressive/dominant behavior can often attract other aggressive/dominant behavior (which is presumably not desired). In other words, you need to be the gray man.
Do you want to change your mental state? Raise your chin one inch. You just became more assertive and at least slightly changed your attitude. Oh yeah.
Let go of your big, fat ego. If someone cuts you off, let them go ahead of you and be on their crazy way. If you make a mistake, admit it and apologize sincerely. If someone flips you off, don’t do it back – pretend you never saw it. Allow their ego to stay intact. This type of an approach will help you avoid all kinds of hassles in the first place!
And much, much more…
4. Techniques
We started with drawing and deploying from the front pocket or concealment (I describe my personal preference below), learning how to do it quickly and under stress. Then we did about 100 other things. We were busy, and did wreaked some real havoc with our training knives.
I won’t attempt to describe what grip to take, where you should target, how to cut, or the variety of techniques you can use for knife retention, escape from grabs, chokes, locks, holds, how to use a knife when ground-fighting or how to integrate knife and handgun. Not only am I not qualified, but reading won’t matter. Doing will.
I will say one more thing about technique: If you’re wondering what it’s like using your knife on something made of real meat – you’ll get to experience that too. (No people or animals were harmed during this course :-).)
5. Equipment – Folding Knife Considerations
Spyderco Delica - Simple and Effective
This is the fun part for many folks, especially the gear-heads and people who use the words “everyday carry” :-). I said it before and I’ll say it again: the knowledge is more important than the gear. You need to get out of your recliner and go get the knowledge and hands-on, what-it-feels-like training. But of course, the gear angle is still fun.
The quick version: Get a Spyderco Delica or two. Why? A few reasons:
1) The quality is high. The steel is good, the grip is easy to hold, and the ergonomics are great for most hands.
2) A Delica is easy to retrieve and open – that hole in the blade is patented for a reason. They made it very easy to open quickly with one hand, with no extra springs or gadgets – simply functional.
3) The blade length is appropriate, and the blade length (approx. 2 7/8”) is legal in most areas (do your research).
4) It is lightweight and slim – will not weigh down one side of your body, pull down your running shorts when you run, or cause unusual bulges. The slim clip is sturdy and positioned in the right place on the handle to make it easy to conceal. In addition, the clip is reversible two ways – top or bottom, and left or right side, which makes it easy to carry any way you chose, whether your right- or left-handed (see #2).
5) They are not very expensive as compared to many high-quality folders: $50-$60. You won’t have to give up meat for a month to afford it. If you lose it, you won’t be crying for a week.
6) And if you care, you can get a variety of colors and steels (e.g. blue or green with ZDP-189), versus the plain black body with VG-10 steel. Of course, the fancier versions cost more. I got one with a medium blue handle, which matches the color of most of my jeans. Not because I care about the color of my socks matching my shirt, but because I want it to not be very visible. There’s a difference!
Of course, you may prefer another brand or style, which is fine. If you can conceal and retrieve it effectively, the blade is legal, it can be opened under stress with one hand, and you can afford it, you’re set! There are many great, solid folders out there from Benchmade, SOG, Kershaw, Gerber, and Emerson, just to name a few. And Spyderco makes many other folding knife variations.
Gray man tip:
This is something they didn’t teach in class, that I have personally found to be convenient. I carry my pocket-knife* in my waistband. Why? It isn’t easy to see by everyone and their brother. I can go to work, out for a jog, to the grocery store, or wherever, without identifying myself as “the guy with the knife in his pocket.” You know who they are (if you notice it once, you’ll always notice it), and may be one of those people yourself. The clip is easy to see on the front of someone’s pocket. And much of the time, that may be perfectly appropriate for you. But I prefer to keep it low-key.
Here’s another reason. Often you can use that visible knife clip that’s on the front of someone’s pocket as an indicator to look a little further, for the accompanying bulge of a concealed handgun. Gun guys are also often knife guys. Am I wrong? Please send me an email and let me know what you think. 🙂
Note: If you have a big belly, keeping a knife on your waistband will probably not work for you.
*Did you notice the non-tacti-cool, unobtrusive, tool-focused words I used? It is just a tool after all, not a “combat-folder” or “zombie-stopper” or any kind of “dangerous weapon”. It’s just a tool. Along those lines, here’s another tip (from class): if you’re out in public and need to open a bag or box or delicately slice off a piece of Camembert to go with your crackers, consider slowly retrieving your knife, opening it slowly with two hands, versus going for the speed-draw and seeing whose attention you can draw with the sudden “snick” of the shiny blade locking open. Gray.
Summary
There you go – this was the very quick version, which will certainly not be sufficient for you to adequately defend yourself with a folding knife, but will give you an idea of what you should be able to do with one, if you can find good training in your area.
If you live in or travel to the Pacific Northwest, I highly recommend InSights Training Center. I’ve taken a few classes from them, and they’ve been top quality. Their website is here: http://www.insightstraining.com/
It’s hard to go wrong with a folding knife as part of your everyday carry, because these tools are so versatile. If you want to have your knife realistically available as a self-defense tool also, please get some training.
“The Road Home” is a cool and unusual book when it comes to ham radio. One reason is because it’s fiction. As far as I know, it’s the only adventure fiction available that focuses on amateur radio as a preparedness tool. Another reason it’s unusual is that it incorporates some educational, non-fiction preparedness tips and tricks throughout the story, so if you want more details on what the protagonists are doing, what resources may or may not be available in an emergency, to learn some amateur radio basics, this book places these resources at your disposal, organized at the end of the book.
The text on the back will give you a good idea of the tone: “Robbie thought he was ready for a camping trip in the mountains near Seattle. He and his father Jeff made it into the mountains without a hitch, but nothing could have prepared them for the rest of the trip! After a city-busting earthquake strikes the Seattle area, Robbie and his father have to rely on their wits and some new-found skills to get home safely, dealing with many unexpected obstacles on the way. To make matters even worse, they still need to rescue the rest of their family from an insidious danger that made its way to their doorstep. The story combines exciting, non-stop action with dozens of practical emergency preparedness and high-tech ham radio tips that you will find helpful in many situations, from going on an uneventful road trip or day hike, to getting lost in the woods, even to surviving a natural disaster!”
You can find several good customer reviews on Amazon. Here is some text from one of them: “It centers on a family separated during a massive earthquake to demonstrate how seemingly helpless situations can be dealt with resourcefully. I loved this book because it drove home the importance of taking personal responsibility for your own well-being when a big disaster strikes. We might never encounter being in the middle of a disaster, this book put me in the space of what it would be like. While reading the book I spent a lot of time thinking about our own situation: Knowing how to turn off the gas to our home, where we’d meet, food storage, warm clothes in the car, keeping the gas tank on full, etc.). There are many preparedness points that might later prove life preserving. I highly recommend this book as a basis for getting your just-in-case affairs in order. When there is nothing but self-reliance, we’d all best have some of these lessons under our belts.”
If you are looking for some good preparedness tips, are interested in how ham radio can be used in an emergency, like a good disaster adventure, or know another adult or young adult (written to be “family-friendly”) who may be, this ham radio fiction book is for you! It’s available in paperback and on Kindle (Note: it was $9.99 on Kindle, but it’s on sale during December for $0.99!).
Full disclosure: I wrote this book! Of course it’s one of my favorites. 🙂
How to Set Up and Run a Map Your Neighborhood Program Where You Live
I decided to run this program in my neighborhood, and decided to provide you with my personal experience and resources that will make it easier for you to do it too! But what is it? Why do it? Keep reading.
What is it? “Map Your Neighborhood” is a program designed to help neighborhoods prepare for disasters. With it you can increase your odds of survival in a disaster. It covers these topics and more:
The 9 steps you should take immediately following a disaster
How to identify skills and equipment available in the neighborhood
How to create a neighborhood map
What should be in your contact list
How your and your neighbors can start working together as a team! (If nothing else, you’ll know who you can go to for help, versus who will probably need help.)
Why do it? As you can see in one of my first CERT classes, the question is raised – “What can I do about helping my neighbors?” And I add the second part of the question – “So that they can take care of themselves versus relying on my resources?” In addition, you may have neighbors with special needs, and these should certainly be identified before an emergency.
Here are the steps I followed to Map My Neighborhood:
Find materials
Check for general interest with neighbors
Send out invitations (invited in person and with paper taped to doors)
Prepare some examples of kits, etc.
Get dessert ready (added incentive for those who need a little more motivation :-))
Make a map to hand out
Get some additional materials from my local American Red Cross
Finding the educational materials wasn’t as simple as I thought it should be. I had to look around for a couple weeks to find what I needed. Although some resources were available online for download, there was no clear description of what specific resources were actually needed to do the training. And when I did eventually determine what materials were needed (it took a couple phone calls), I wasn’t able to find them in one place.
How did I do it? We don’t have this program in my city, so I didn’t have a local contact. I tried the county emergency management office, and found nothing. I tried the state, and they put a DVD in the email for me, along with one sample handout. At the time, I didn’t ask for more copies, although I probably could have.
And then, since I was taking a CERT course in a neighboring city (since my city also doesn’t do CERT :-(), I asked about finding the Map Your Neighborhood student handouts and found some. You may need to be creative, and don’t hesitate to check with neighboring emergency management offices! People in these roles are usually (and certainly should always be) very helpful and generous with educational resources.
Here are the materials you need to run the Map Your Neighborhood program:
Attendee/Student handouts: I had to get these locally from a neighboring city’s emergency management office, since my city’s office couldn’t help for whatever reason.
Training DVD: I had to get this from the state emergency management office. I may have been able to get a copy locally, but I didn’t know who to ask at the time. This will give some useful tips, but as you will be able to see later, I didn’t use it directly in my presentation. I probably broke the rules there, so don’t tell anyone.
Instructor discussion guide/manual: I downloaded the discussion guide here: http://www.emd.wa.gov/myn/documents/myn_discussion_guide.PDF. (Thanks to Washington State Military Department Emergency Management Division for making this available!
Anything else you want to give out: I found good handouts from my regional American Red Cross on disaster preparedness and more. I suggest you go to your local chapter and ask for some materials to give y our neighbors. You’ll probably walk away with your hands full.
Map Your Neighborhood handout (center) and Red Cross handouts
I reviewed the video, handouts, and teacher’s guide ahead-of-time. The good news – I learned a couple things. That’s the great thing about teaching/guiding a group – it’ll force you to learn things yourself!
Now that I knew the basic curriculum, I knew how to summarize with neighbors over the next week. Whenever I saw one of them, I mentioned “Expect an invitation taped to your door soon, for the disaster preparedness program we’ll be running at our house. It won’t take long and you’ll learn something!” I also tried to get a feel for when they would be available, so that I could propose a time/date that would get the best attendance.
One of the neighbors was clearly interested in what it was about, so I gave a few more details. Aside from wanting to help him out with the information, I wanted to gauge his reaction, so I’d have a better idea how other neighbors would react. He was quite interested, and also didn’t know how to do some of the things we discuss, e.g., turn off his natural gas line. Just the type of student I’m looking forward to working with!
Later that week, I finished drafting and printed out a “Howdy Neighbors” letter, and handed it to the neighbors in person in the evening, or taped it to the door of the couple that weren’t home.
I got a variety of responses:
“Great, looking forward to it.”
“Thanks, this is a good thing you’re doing”, and shook my hand. He appeared to be very interested. Later I learned otherwise (see Part 2.)
“Yeah, OK”, and shut the door quickly. Maybe I was interrupting dinner…
“Great.” Short and sweet. I knew this guy was already well-prepared.
I had a few concerns at this point. Could I get them to show up? Can I fit them in our living room? Can I keep them comfortable? Will they find the material interesting? Will they ask a bunch of questions I don’t have answers to? And worst of all, by doing this, would they now view me as their “disaster plan” for an emergency, instead of preparing for themselves?
Do you want a template to use for your neighborhood? Free for my readers – you can use this one or modify it as you see fit: download doc here. Simplly fill in the [bracketed] areas and you your own, personalized letter, ready to go.
To see how the meeting went, read Part 2! (coming soon :-))
This is it! Our final exercise! (Note: In order to not ruin the fun for the next CERT classes that happen, I won’t give away the good stuff, so thosee folks can learn from their mistakes too! :-))
It was a cool and not rainy (yes!) Saturday morning, and I could feel the excitement in the air as I walked up to the group of classmates who were milling around, waiting for things to get rolling. I signed in with the instructors and waited to get rolling. It didn’t take long.
We had selected an Incident Commander (our “IC” – do you remember ICS from Day 2?) in our last class session, and she was ready to go. After we arrived for the exercise, we all chose teams (search, rescue, medical, runners, etc.) and were ready to go. One of the instructors told us “We just had an earthquake”, and the drill was on!
And then things really slowed down. Me and another guy were tasked with examining the outside of the building that we were using for our scenario, and that took a few minutes. We saw nothing significant. Apparently the instructors didn’t think it was important to heighten the realism by starting a couple fires, taking a sledgehammer to the gas line, or breaking out the windows. Oh well – maybe when the read this article they’ll do that for the next class. (And the gas company could to their own “fix the vandalized gas line” drill at the same time :-)).
After that, we knew that the building appeared to be structurally safe on the outside, and other teams of searchers made their way inside. And the slowness continued. Since I was in and out and helping search and doing other chores, I obviously didn’t see everything that was going on, and certainly wasn’t able to view things from the IC’s or instructors’ perspective, but I didn’t need to see everything to realize a few things as the scenario progressed:
Injured people had to wait a long time to get treatment, even when injuries were life-threatening.
People who could have lived “died” instead because we took too long to get to them.
It was difficult to maintain communications to and from the IC, even when using runners (and since our class was pretty big, it was even harder!)
Orders changed midstream, either because of rumors spread when connecting with other search or rescue teams, and in many cases because people on teams simply decided to do something else after they got started doing one thing. It turned out to be very easy to get distracted by crying victims, a fire or chemical spill (or in our case, signs that indicated these situations), and many other things.
This was what they call a “dynamic” environment, not because the quake was still happening or because pieces of the building were still falling down, but because we had introduced a whole new batch of humans to the overall equation, and all of us rescuers kept changing things.
The IC had a tough job! Not only did she only have runners for communication, she needed to keep track of who was where, whether all her teams were safe, and had to do her best as victims kept dying off.
I’m not pointing this stuff to point blame to anyone — our class did a great job! But instead I want to point out that in an environment like this, it will be confusing, and that confusion could potentially result in additional pain and suffering. Such is the nature of a natural disaster. Now you won’t be surprised. (I know – if you’re reading this type of article in the first place, such a statement is unlikely to be a surprise!)
Here’s another interesting thing I noticed. I died! That’s right. I broke one of the simple rules: “Never get separated from your buddy”. Easy, right? Not in this case. We were a three-person team, and we had stopped to rescue an injured girl. After a little hemming and hawing, I decided that I could easily carry her in my arms, downstairs to safety and treatment. We talked about what the other two should do. I looked away for a moment, saying something about us needing to stay together, and before I knew it, they were off on their own. I headed toward safety anyhow. (At that point, I think the only alternative that would have kept me from breaking the rules would have been to drop the victim and catch up with them. That seemed silly, so I didn’t. My mistake. An observer looked at me and said “You have no buddy – you just died.” The fact that this observer also seemed to be encouraging us to split up right before my two buddies took off didn’t help anything. Maybe he was playing devil’s advocate – I’m not sure. And it doesn’t matter. The rule was simple, I broke it, and I was dead. (It was only a 15-minute “time-out” and then I got to play some more, but the lesson was still quite clear.)
Use the buddy system, like the Army Rangers do!
What does this prove? Even in this contrived situation, it doesn’t take a rocket surgeon to realize that in the midst of bad things, more bad things can continue to happen! Did you read about search and rescue from Day 7? Can you imagine listening to someone crying for help inside a collapsed building, but knowing that if you went in you could possibly cause further collapse (injuring your victim further or killing him/her) or make matters even worse by injuring or killing yourself? This was the type of situation our instructors were trying to avoid. If you have your buddy with you, you’re likely to live longer when your environment is in turmoil. Elite military units do it for the same reason, and we should too. Have you ever heard of a Ranger Buddy? Go to Army Ranger School, and you’ll learn about it (or just keep reading this article – much easier). At Ranger school, you and your buddy are inseparable, and watch each other’s backs. And if you do get separated somehow, you can expect at leat lots of pushups and some yelling. (No, I was not a Ranger, but I was in the Army, and have this on good authority :-).)
A situation like this disaster scenario is HARD to deal with. The class did a great job, especially for our first drill. The biggest lesson I learned is that in order to not make a worse disaster of an existing disaster, I and the rest of my CERT team will need practice!
The good news is that we have another drill coming up early next year, and I’m looking forward to correcting some of my own mistakes and hopefully adding value to the rest of the group.
Let me sum up this experience (at least for now – I’ll probably write about upcoming drills too) by saying this:
Taking a CERT class is good, but it’s only a very basic preparation for a disaster.
Participating in additional drills will help cement your training (if I wrote clearly, this is obvious to you already). If you don’t exercise these muscles, they’ll waste away. Don’t let all that time you invested in training go to waste!
If you haven’t taken a CERT course, do it. It won’t hurt. It will help.
This was our last class in the classroom, and it was a pretty good one. Of all the classes, I like this one best because I could re-learn or practice many of the most important things from all of hte previous classes, in preparation for our upcoming “field exercise”.
We had a few stations to rotate through, including head-to-toe assessment and bandaging/splinting. We also had a “rapid triage” station, at which we had 10-15 seconds to pick up a card, read the condition of a victim, and write down our assessment (green, yellow, red, black). It wasn’t easy! But it was a great way to review quickly, and we went throught the scenarios quickly as a class afterwards.
Additionally, we reviewed a lot of the highlights from previous classes in a big slide deck, along with some new, supporting material. Let me take this opportunity to say again that our instructors did a fantastic job making sure we had useful, interesting content to review.
Especially to prepare for our upcoming exercise, we spent some more time on reviewing building layouts and discussing how we would conduct search and rescue operations in a variety of situations.
Of course, none of this could have prepared us for the mind-bending insanity that was our Final Exercise. Not many survived that day, unfortunately….
The “rules” for light search and rescue, for example, trying to help people who may be trapped in a building after an earthquake (or anything else that could knock a building down) are as follows:
1) Be safe!
2) Do the greatest good for the most people, vs. dedicating all of your resources to solving one problem of many
Of course, before you run willy-nilly into a building to rescue someone, you need to determine whether you will die if you do that :-|. You must evaluate the scene and see how dangerous it is. One of the first things to do is to look at the damage. If it’s light or medium damange, you may consider entering, searching, and rescuing as needed. If the damage is heavy, don’t go it.
Earthquake-damaged basement - would you go in?
“Don’t go in and rescue the crying person? That’s terrible!” Yes it is. But it’s not as terrible as you going inside and possibly:
1) Causing the building to collapse further, making the situation worse for the trapped person or
2) Getting trapped yourself, making the situation worse for everyone else you could otherwise be helping, as well as for yourself!
What do you do when you encounter heavy damage and someone making noise inside? You say “I can’t come in. It’s too dangerous. We’ll send in someone with the right training as soon as we possibly can.” Those are the unfortunate, frustrating words you’ll get to shout to some poor soul who wants out.
In addition to learning more about damage and search techniques, we learned a bit about cribbing. What is cribbing? If you look up the noun, it’s defined as a temporary wooden structure used to support heavy objects during construction, search and rescue, etc.
We also used it as a verb: to build up those wooden supports while levering something heavy off of a victim. This comes in handy when you have a piece of wall or bookshelf or whatever pinning a victim down, and some other pieces of wood to use as a lever and cribbing to free him or her, in an emergency. It’s not too difficult to imagine a situation like this after an earthquake, when the fire department is too overloaded to help, and it’s a life or death situation.
Cribbing Exercise: Rescue the Trapped Victim
As you can see in the picture here, we have a victim trapped under a pallet with a huge tire on top of it. The piles of wood are pieces of 2×4, but for purposes of emergency cribbing, they of course don’t have to be as pretty as these. What did we do next? After our FD captain explained the basics, we used a lever and pieces of wood to slowly and safely (it didn’t fall back onto the victim or any of the rescuers!) raise the pallet off of the “victim”, so we could pull her out and do first aid. To see what the end result looks like, take a CERT course! 🙂
Do I expect I’ll be doing any cribbing soon? No. Is it more likely that I’ll need to use a fire extinguisher effectively? Yes. But it’s also a good tool to have in your toolbox, and I know a lot more now about it than I did before.
As with everything we do in our CERT training, this will not make me an expert Search-and-Rescue operator, or a carpenter, physician, or engineer. But it does give me some good ideas for how I can help in a pinch.
I’ll freely admit that I’m generally not a fan of the “… for Dummies” books. I have found that they’re often big on filler and cute graphics, and light on useful data. I have purchased a few, and later realized that I could have bought a half dozen other books that contained twice as much information, even at the beginner level. However, Ham Radio for Dummies is an exception, and contains a lot of useful information. I have referred to it more than once, especially when I was just getting started. (Confession: Even after a few years messing around with ham radio, I still refer to it occasionally!) H. Ward Silver is a recognized expert in the field, and has obviously ensured that his book isn’t full of noise (no pun intended :-)). He did a great job laying out the basics in a way that a beginner can understand, even if he or she doesn’t have an electrical engineering degree.
When I looked back through the book again for the purpose of writing this mini-review, I was even more impressed than the first time I read it. Not only is there a ton of information for the very beginner, there is also a ton of information for the experienced ham radio operator. If you want to learn about different emergency communications organizations (e..g, ARES & RACES), there’s info on that. Do you want to learn about digital modes you can use? This serves as a great primer for that area too. Or maybe you haven’t gotten licensed yet and are looking for an easy, common-sense, inexpensive approach to getting your license out of the way. Ward does a great job of describing a variety of useful options, and will save you a lot of legwork and wasted time.
What’s covered in Ham Radio for Dummies?
Part 1 – What is Ham Radio All About? — will get you acquaint with ham radio in general
Part 2 – Wading through the Licensing Process — it’s easier than you think!
Part 3 – Hamming it Up – Making contact, using your radio in general, emergency communications and public service opportunities
Part 4 – Building and Operating a Station That Works — that’s right — setting up your own radio station, which is also easier than you think 🙂
Part 5 – The Part of Tens — nifty lists of ten items each — 10 secrets for beginners, secrets of masters, first station tips, easy ways to have fun on the radio, etc.
Part 6 – Appendixes — glossary, other listings, and a Morse code table
Ham Radio for Dummies is not for dummies. If you’re interested in learning about ham radio, you will be wise to start with this book. 🙂
ARRL 2014 Handbook for Radio Communications, from www.ARRL.org.
My reference book Personal Emergency Communications is by no means an exhaustive “how to” when it comes to ham radio. There are 1300-page tomes on that subject. In fact, this is the definitive Amateur radio guide: the ARRL Handbook for Radio Communications. The handbook also comes with an e-book version with an attached DVD, so you can have a copy handy on your computer just in case.
Note (4/19/2014): If you weren’t aware, the ARRL Handbook is updated yearly. Since this was originally posted, the 2012, 2013 and 2014 editions have been published. As it turns out, the 2014 edition is the “Centennial Edition”, with 1320 pages and 5.5 lbs. of radio reference goodness, including all manner of brand new information and searchable CD-ROM . I haven’t purchased one of the latest versions, but I’m confident that the description ARRL provides is accurate.
Here is the link to the 2014 hardcover edition (currently lower cost than the paperback edition!).
This 91st edition of The ARRL Handbook for Radio Communications marks a milestone: the 2014 ARRL Centennial. For 100 years, ARRL has been at the forefront of promoting technical advancement and improvements in radio operating practices. And since 1926, The ARRL Handbook has defined the latest innovations in the field of applied electronics and communications. The Handbook is written by radio amateurs…for radio amateurs, experimenters, engineers and students.
This commemorative edition has been extensively updated and revised…
New Projects:
A one- or two-tube linear amp for beginning builders
VHF and UHF signal sources
QSK controllers for amplifiers (analog and digital)
New Information
MOSFET design for power amplifiers
Telemetry and navigation data including GPS
Oscillators and synthesizers
Current battery technology
The new Codec2 software for HF digital voice
New material on microwave techniques
Annual transceiver model review CD-ROM Inside! Includes all of the fully searchable text and illustrations in the printed book, as well as expanded supplemental content, software, PC board templates and other support files.
If you are looking for an incredibly thorough antenna reference, the ARRL publishes one of those too, the ARRL Antenna Book: The Ultimate Reference for Amateur Radio Antennas, Transmission Lines, and Propagation. It’s very comprehensive (as its long title would indicate) and I’m not aware of anything more detailed or thorough when it comes to understanding antennas of many types. It describes almost any kind of antenna you can imagine (and probably many you wouldn’t), with building guides and specifications for many types of antenna projects.
Update (4/19/2014) I have referred to this book several times over the years. But since I’m not an electrical engineer, I’ve usually spent more time referring to less meaty books, for example, Low Profile Amateur Radio. That’s not to say you won’t find many uses for this reference. No ham radio library is complete without it! 🙂
I can say honestly that if I had paid more attention to this book early on, I would have saved many hours of sweat and frustration. It’s full of simple antenna concepts that work well in emergency-type situations because they are often small, portable, and can easily be temporarily rigged. But at the same time, these same antennas would do very well in a permanent installation. I recommend this book to anyone learning about antennas, especially if you want to save a ton of time and effort!
As opposed to some of the engineering-heavy amateur radio tomes available, I found this book to be lighthearted, easy-to-understand, and suitable for many beginners.
Chapter topics include: Covenants, Conditions and Restrictions, Low-Profile HF Antennas, Disguised Antennas, Indoor Antennas, Operating Modes and Tips, Interference, Antenna Tuners, Transmitter Output Power, Low-Profile VHF/UHF Antennas, and Mobile Operating
Pay attention to this guy’s recommendations. He knows what he’s talking about.
(4/19/2014) I have sad news. It appears this book is out of print. While it’s still available on Amazon.com, my last searches show that it’s prohibitively expensive. Maybe this is where I need to think about focusing for my next book! 🙂
Strong recommendation: If you see this book for sale at an amateur radio convention or flea market, snatch it up!
On our 6th day of CERT class, we reviewed fire safety and learned how to effectively use a fire extinguisher to put out a real fire.
Let’s review what everyone knows: Fire is really, really dangerous. Not only it is hot, which hurts, it also makes smoke, which is often full of all kinds of other terrible things that can kill you other ways.
We covered a few basics, e.g., use the buddy sytem when fighting a fire, CERT teams should only be fighting small fires, make sure you wear a mask, leather gloves, your green CERT hard-hat (or whatever hard-hat you have handy), etc. Then we spent a fair amount of time reviewing basics, e.g., fire requires heat, oxygen, and fuel. While that may seem boring and basic for a third grade science class, there is one interesting aspect to one part of that triad. The type of *fuel* makes a difference when it comes to how you want to put it out. Your fire extinguisher should be rated for putting out a fire that’s buring a certain type of fuel.
The fuels determine the class of fire:
Class A: Ordinary combustibles – paper, cloth, wood, rubber, plastics
Class B: Flammable liquids, e.g., gasoline
Class C: Energized electrical equipment
Class D: Combustible metal (e.g., aluminum, magnesium) Metals burn? A common survival fire-starter is a block of magnesium! You scrape off shavings add a spark, and they burn hot.
Class K: Cooking oil, e.g., vegetable oil, fats
The fuel matters. If you have a class C fire, spraying water on it could actually kill you, or create dangerous, energized puddles, waiting to electrocute whoever steps in them!
One of the biggest causes of fires after an earthquake is a natural gas leak. After an earthquake, shut off your gas, unless you’re absolutely sure you don’t have a leak. One way to tell you have a leak is you see the gas meter dials moving when you aren’t using any gas.
Let’s say you have a fire in progress. Do you try to put it out? Here are some questions you need answers to:
Do I and my buddy (buddy system!) have the right equipment? (Especially the right type of fire extinguisher.)
Are there any other hazards? (Your safety is Priority 1!)
Is the building structurally damaged?
Can I and my buddy escape?
Can we fight the fire safely?
We reviewed types of fire extinguishers and how to use them. They fall into these categories: water, dry chemical, carbon dioxide, and other specialized types. In addition to being rated by the type of fuel on which they should be used, some have another number to indicate the volume of extinguishing agent.
A CERT Firefighting team in action
We go to use them! The nice part is that we knew what the fuel was (liquid) and had a bunch of fire extinguishers ready. We practiced using the buddy system, had on our safety gear, and used the PASS system, Pull (the pin), Aim, Squeeze, Sweep. The only parts that may not be intuitive are #1 – pulling that pin in the first place. Sometimes people forget to do that in the stress of being near open flame. The other part is the “sweep” part. You will need to aim at the base of the fire (not necessarily the biggest part of the flames, which is where you may intuitively want to aim) and move the fire extinguisher back and forth along the base of the fire, to ensure you covering it fully.
We continued to put out fires, until everyone got a chance to put out at least one. The picture gives you some of an idea of what it looked like. It was dark and a bit rainy, but the flames were big and we were able to put them out. It was fun, and a new experience for most of us.
Reading this is not the same as taking a CERT course and fighting a real fire with a real fire extinguisher.
Can you point to the north? I would guess that it’s OK if you don’t know, because as you read this, you are probably at home or somewhere else familiar and it doesn’t really matter. However, when you figure out what you need to have with you as part of your every-day carry (EDC), you might want to consider a compass, especially if:
You are new to your area
You travel frequently
You often get lost – it’s OK to admit it 🙂
You like to go hiking or camping
But will it be a hassle to carry a compass around with you all the time? Not if it’s a tiny, brass compass like the kind you can buy at Triple Aught Design (TAD Gear). It’s smaller than a dime in diameter, and quite rugged. Here’s what it looks like. And if you want to save a few bucks, and are OK with black instead of green, you can get the same one for $36 at www.bestglide.com (at this link). The compass is known as the Pyser compass, or a NATO survival compass, and it has its origins in World War II, when it was issued to pilots.
You might also want a compass like this if you have a very small survival kit. While there are other small compasses close to this size, at far lower price, I’m not aware of any decent-quality compass that’s this small. If you don’t need the smallest, you can save a few bucks and get a high-quality, slightly larger compass like this.
Below is what mine looks like after several months of every-day carry. You can see that some of the custom green paint has worn away, because I’ve carried it in the change pocket of my jeans, with… change. The constant abrasion of metal coins has worn the green paint around the edge, but the compass still works as it’s supposed to, and I’m not worried about it not looking quite as pretty as it once did.
NATO Brass Button EDC Compass
Since the compass is incredibly small and light, I don’t notice that I’m carrying it, but since I spent ~$40 on it (TAD gear is not inexpensive!), I have been careful about not leaving it in my pocket on laundry day. So far so good.
You won’t want to use this compass as your main compass in an orienteering course. You will want something that provides more detail, like this much larger, very good Silva model. But if you are turned around in a new town, or just reached a fork in the trail and aren’t quite sure if you’re taking the correct direction, and need to double-check and get your bearings, and only have whatever is in your pocket, this tiny compass will do the trick!
Last and (admittedly) probably least, this little compass is just plain cool. It’s really small, it works, it’s durable, and you won’t notice you have it with you, that is, unless you need it!
Day 5 – Terrorism, Hazardous Materials, and Disaster Psychology
Day 5 was an interesting mix of topics: terrorism/hazmat and disaster psychology.
Terrorism/Hazmat
In the first part, we reviewed procedures for hazmat (hazardous materials) and terrorism. As far as CERT is concerned, they’re about the same. Get out. Easy, right? Do you feel prepared now to deal with a hazmat or terrorism scenario? I hope not. Let’s dig a little deeper. But don’t get your hopes up. Just as CERT training won’t train you up to paramedic or EMT level, it also won’t transform you into a counter-terrorism expert or professional hazmat responder. But it will get you thinking!
Since the responses to a hazmat scenario and terrorism are largely similar, we’ll focus on the worse version – terrorism. We started by reviewing what kind of targets exist in our area. They will be similar in your area:
Big business, shopping malls
Military facilities
Schools
Bridges, tunnels, subways
Government buildings
Water supplies
You can easily think of more targets: anywhere where you can find a lot of people or stuff that people care about. This should be a somewhat discouraging exercise, and you will probably be able to think of many vulnerable areas. Isn’t it great that we don’t have to deal with terrorists frequently?
The types of terrorist attack are described with the acronym “CBRNE”, which stands for Chemical (e.g., chlorine gas), Biological (e.g., anthrax), Radiological (e.g., distributed radioactive material), Nuclear (e.g., a nuclear explosion), and Explosives (e.g., dynamite).
We quickly reviewed signs of potential terrorist activity (before the explosion goes off), and how we should react. You guessed it – call the police and get out.
But let’s say you arrive at a disaster scene, ready to help, and you realize that it’s a hazmat or terrorist scenario. Again, the guidance is simple: get out. But how far do you go? The fire department captain who taught this portion of the course gave us an easy-to-follow rule, one of the pearls of wisdom we received on this day:
“If you can hold up your thumb, and you can still see the scene, you are too close.” He told us to keep backing up until you thumb covers up everything. Not just “get out”, but “get really far out.”
And we briefly covered what to do if you need to shelter in place (aka “hunker down”). Assuming there is a cloud of danger (gas, radioactive material, whatever) heading your way, you’ll need to shut off your air conditioning (or furnace, or anything else that draws in outside air), cover any openings to the outside with plastic sheeting (sealed with duct tape), and turn on your radio. Obviously, you’ll want to seal door edges, any vents or heater ducts, and any other cracks in the room that would allow air to enter or exit.
Do you need to worry about suffocating? Not in the short term. There is a lot of air in even a small room (though you probably don’t want to choose a closet). I won’t do the calculations here. Do a little research and you can see for yourself (or let me know if you’re interested and I can write something up and post it).
A couple more caveats concerning contamination:
Basic decontamination: remove all clothes, throw them away, and wash thoroughly
Don’t go into a contaminated area (CERT training doesn’t teach you how to survive this!)
Don’t become part of the problem – leave any hazmat or terrorism response to the professionals
Disaster Psychology
This next section was fascinating, and taught by the city chaplain. Don’t let that throw you! Not only did he not push any religion, he even cussed a little. He was not your typical religious figure, but he was a down-to-earth, slightly gritty, and helpful guy with some very important things to say.
“80% of trauma in a disaster is psychological.” He said this more than once, and we reviewed some examples. As I’ve said in other articles, this is heavy material, and you can expect that people will 1) act irrationally and 2) they may need some help recovering, or getting on the path to recovery.
What is the CERT responder’s role in dealing with people going through various stages of grief or otherwise dealing with their trauma? The chaplain had some simple (simple to discuss, much harder to implement effectively, but it’s the right direction) guidance:
We (whoever has experience) do support, initial care in the first minutes, not long-term counseling
Just acknowledge people’s grief – that’s all you can effectively do
Help them make little decisions around what to do next
People will be distressed, overloaded, and some will shut down
The people in real distress can get real comfort from talking with someone, and maybe that someone is you. Simply by being there to listen, you could make a big different to someone in need by answering these three, simple questions:
Does anyone know I’m here?
Does anyone know that I’m hurting?
Does anyone care?
Hint: Answer “Yes” to all of them. And I hope you’re telling the truth!
What do you NOT want to do? Tell someone that “It’ll be OK.” It won’t be OK – something really bad has happened! “It’s for the best”, “Don’t worry about it”, or other such advice that won’t help people.
The chaplain added “I don’t tell them that we’ll get things back to normal. Things will never be normal again. They will move toward a new ‘normal’.”
Remember, after triage and first aid, expect that some people will need “psychological first aid.” This short article can’t prepare you, but a CERT class should give you a little more info and help you learn some of the basics.
Day 4 – Disaster Medical Part II – More basics, Water, and… Poop
Much of day 2 of Disaster Medical was pretty similar to the first. We had more “what if” questions, and covered some first aid basics, as well as some unique material.
The first-aid-related material was around doing a head-to-toe assessment, using the standard “DCAPBTLS” system, checking for: Deformities, Contusions, Abrasions (scrapes), Puctures, Burns, Tenderness, Lacerations (cuts or gashes), and Swelling. In addition, we reviewed basics for cold and heat-related injuries, burns, bites and stings, and wound care. One more reminder (probably not the last!): if you haven’t taken a first aid course, you should, and you can cover this material there.
But there was some interesting and less common material in this section, specifically “Public Health Considerations” and “Disaster Medical Operations”. I’ll start with the least interesting first.
In the Disaster Medical Operations section, we learned some fundamentals about how to lay out what amounts to a field clinic or hospital, with descriptions of how to lay out a medical treatment area, as well as separate areas to cover triage, transport, morgue and supply. You read right – we need to be able to set up a morgue. I hadn’t thought about that before, but it will be necessary, and it’s worth thinking about. I won’t dig into details here – it’s still up to you to take the course.
The last area I’ll cover in this article is one of the more interesting ones in my opinion: Public Health Considerations. We reviewed some guidelines here on purifying water. This is something everyone should know. If you don’t have water, you’re in big trouble. If you drink contaminated water, it could be just as bad as having none, after the parasites or bacteria are finished ravaging your insides. You must know how to purify water.
The technique covered in this course is to use bleach. Here is the formula:
Use 8 drops of unscented (no “lemon scent” or “fresh scent”) bleach into one gallon of water if it’s clear
If the water is cloudy or dirty looking, double the dose (12 drops)
If the water doesn’t smell like bleach after 1/2-hour, then add 6 more drops and wait 15 more minutes.
If it still doesn’t smell like bleach, repeat #3 until it does.
There you go – pretty simple.
But be careful. Bleach doesn’t last. If you have bleach that’s a year or two old, it may not work at all. You should ensure you have a fresh jug of bleach on hand. Or, if you want to get a little more hard core, you can get calcium hypochlorite (aka “pool shock”, used to clean pool water) and add water whenever you like, and you’ll have instant bleach with which you can treat your water.
There are many other methods available for filtering and purifying water, and you should definitely investigate them. We only covered the bleach option in this course.
And last but not least, we spent very little time on this topic, but it’s worth bringing up, and if you don’t know what to do with it, you’ll be in trouble. You’ll need a plan for poop. Yeah, that’s right. What will you do with your poop? If your toilet doesn’t flush, where will you put it? Hint: *NOT* in the toilet. You’ll just have to fish it out later – yuk!
Here’s what it says in the book: “Burying human waste. Select a burial site away from the operations area and mark the burial site for later cleanup.” What? That’s it? Well, sounds like a piece of cake. But it’s not. Are you going to lean over the burial pit every time you need to go #2? No.
In the old days, folks would dig a hole and build a shack over it, the common outhouse. If nothing else, you’ll need a trench and something you can sit on, and you’ll need to shovel dirt over your mess when you’re done, to prevent flies from spreading bacteria everywhere. But what if there’s snow falling outside? Or it’s pitch-black out and you’re out of flashlight batteries? Will you be stumbling around in the dark, near the hole filled with…? Not a good idea.
Consider an empty five-gallon bucket and another full of dirt or cat litter. Do you business, cover it up, and put the lid back on. That’s a step in the right direction.
This isn’t an article on how to manage your poop if your toilets go away, but instead I intend to get you thinking. In a disaster scenario, you should have a plan for how to use the toilet inside, when your normal toilet isn’t available. If you have that plan, you will be much more comfortable. Think about it, and give it a lot more thought than “you’ll bury it somewhere, sometime.”
This article could save your life, or your child’s. Please pay attention. I recently heard something that got me thinking, and I hope it gets you thinking too.
Emergency preparedness is much more than planning for the power to go out or storing extra tap water. For example, today I attended an exercise that walked through detailed plans that you will never want to see in action: an “active shooter” scenario in a hospital.
What’s an active shooter scenario? In this case, the story was that a man with a handgun was making his way through the hospital, intent on reaching his hospitalized girlfriend, and shooting anyone who got in his way. A security guard went down, and a nurse, and then some patients, and a doctor, and suddenly the bad guy has a hostage – his (ex-) girlfriend. I’ll admit – walking through it gave me goose-bumps. Something like this happening for real would be truly horrible.
It doesn’t have to be a hospital. It could be your workplace, and you probably recall such a story from the news, whether it was at a steel plant where another round of layoffs just hit, a college campus where a mentally unstable student failed another course, or any similar scenario. Put yourself in your workplace, the grocery store where you usually shop, at the mall, or even in your own home (one of the scariest cases, as I describe in “The Road Home”), and then imagine that you have a bad man with a gun, who happens to be shooting. What do you do?
In the exercise I went through, we stepped through existing procedures as the incident progressed, from calling “codes” over the intercom to alerting law enforcement using 911, to other lock-down and alert systems in place. And in the scenario people panicked (of course), injuries needed treatment and there was a lot of general confusion.
In the midst of that confusion I learned something that dramatically increased the value of the exercise for me and the other participants. A law enforcement officer, specifically one of the team leads for our regional SWAT (Special Weapons and Tactics) team, who also runs Active Shooter Response training for all of the local police agencies, had some words of wisdom.
Before I pass these words along, let me make a couple things clear. 1) This article is for educational purposes only and I’m not giving you specific advice for any situation. This is just another tool, another option to consider if faced with a dilemma. 2) In general, if you are given advice by law enforcement, you should probably follow it. If you are given orders by law enforcement in the middle of a bad situation, just follow them. This approach will probably keep you alive, or should at least keep you from getting into worse trouble. You will have to decide, in the middle of whatever situation, what makes sense for you.
Let’s get back to what the SWAT officer said. Given this particular scenario of a lone gunman moving from point A to point B in this building, here is what he said. “In a case like this, you will be told to stay down and hide behind closed doors. That is the official policy. However, that’s not what I would do, and here is my personal advice. Don’t. Get out of the building as quickly as possible and run. I tell my kids at school that if this happens, throw a chair through a window and get out and run. Don’t just wait. Often, the reason you are told to stay and hide is because of liability reasons.”
Did you catch that last part? That’s right, liability reasons. Not life-and-death, common-sense reasons. You may not be getting guidance that is intended to keep you alive, but instead, you’re getting guidance that will protect someone’s backside if you decide to sue them later because of the advice they gave. That advice is what their lawyers require, and that is not necessarily what makes sense.
I talked with the SWAT guy afterward, and the scenario, and some variations on the scenario. For those of you who ask “what if”, yes, there are infinite scenarios that could play out here. The guidance is general, and here is the reasoning behind it.
If someone is indoors, trying to go from one place to another and shooting along the way, you want to go (run) away from that person, vs. waiting in his potential path (whatever path that may be).
Running people are harder to shoot! This one is pretty simple. (If you don’t believe him, try to shoot and hit anything that moves. It’s not easy.)
Outside is bigger than inside. You have a lot of options once you’re outside, including the ability to run in a more directions.
Inside is where the bad guy is. Outside is better.
How can this advice go wrong? You can probably think of a few ways, and one of the most obvious would be in the case of an organized terrorist attack, if they were also waiting for you at the exits. Or you could accidentally run into the path of the shooter instead of away from him. Or maybe there are two shooters and you run into the path of the other one. Like I said, there are countless ways this could play out, but in a scenario with one bad guy, it doesn’t take a rocket surgeon to figure out: get out of the building.
This guidance is another tool to add to your toolbox. You need to think for yourself, and be able to evaluate the sense of the rules you are expected to follow, especially when your life is at stake!
Things are picking up! We covered the first half of our Disaster Medical material. All told, we covered triaging in a disaster scenario as well as some basic first aid.
Triage is interesting. What happens in triage? You essentially decide who lives and who dies. Wow. Thank goodness we get training on this, and don’t have to completely figure it out on our own if a disaster happens! Yeah, it would still really suck, but it will suck a little less after having gone through this.
The quick version, at least in our county, is that you’ll have to tag people (with colored, non-sticky tape like surveyor’s tape, which you tie on somewhere ) green if they’re walking wounded, yellow if you can wait to treat them further (not life-threatening injuries), red if they have life-threatening injuries they could recover from with immediate treatment, or black and white (stripes) if they are 1) dead or 2) they’re going to be dead soon and there’s nothing you can do about it.
Again, this is heavy stuff to consider. Why subject yourself to these morbid notions? Because if the time comes when you do need to triage, you will have at least a little training under your belt. It’s better to sweat in training than bleed in war, they say. You might as well think now about what tough decisions you might need to make (and this doesn’t only apply to triage), because they will only get harder to make later, in an emergency.
We got to do a hands-on exercise, and kudos to our actors. Some were appropriately noisy (which I expected, but still added to the stress of making the right call) and some were surprisingly quiet (which I guess wouldn’t be a big surprised if they were shell-shocked, now that I think about it). We had to evaluate them on the spot, make a call (green, yellow, red, black & white), and move forward. We directed the walking wounded back to the door we came in through. It was a good learning experience. And just reading or talking about it wouldn’t have been nearly as good of an exercise. Doing this was important, and I know there is more “doing” to do. I’m looking forward to it.
As far as the first aid material goes, you should know this stuff already: how to not contaminate yourself with potentially deadly goo by wearing gloves, mask, and eye protection (if you have them), how to stop bleeding with pressure, putting on a bandage, rolling someone into a recovery position, and more. If you don’t know it, either take a CERT class, or better yet (as far as first aid is concerned) take a first aid and CPR course through your local Red Cross or whoever else teaches it! There is no good reason not to do this. Even if you’re handicapped, they will accommodate you. Please do it.
Another thing I liked about this class: even after taking an EMT course and a variety of first aid courses over the years, I never had to take gloves off when they were actually covered with muck (the goal being to not get any on your skin as you remove the gloves). I won’t give away the teacher’s secret (hint: it’s used in a mocha), but our gloves were actually coated in muck, and we learned whether our technique for removing them worked. A good test, indeed!
We started with paperwork. Not too interesting, at first. They handed out some checklists for 3-day kits, waivers, etc. One of them was an icebreaker, a simple set of questions. One of the questions “What are three things you have with your right now that you can use in case of an emergency?”
When the group went through the exercise, the answers were interesting, and it was a good way to start to get to know classmates. Some people thought their cell phones would be most important. Some people thought their vehicles would be most important, especially those with first aid kits. One other guy and I had written down “my brain” as the most important item. I’m sure that will come up later, especially when we cover “disaster psychology” (which I know is coming – I peeked ahead in the manual). This got people thinking, and led to another set of questions.
After filling out a few more forms, we started discussing three-day preparation boxes and what should go in them. After a somewhat disjointed conversation and many random questions (this idea was new to many, which is probably one of the reasons they’re in the class – good for them!), one lady thoughtfully asked “I’m a nice person and there is no way I’d be able to not help my neighbor in a time of need. What should I do to prepare to help them?”
I’ll be honest – I don’t remember the answer the instructor gave, probably because it differed from what was bouncing around in my head at the time (or maybe my noisy, inner dialogue was drowning her out – that happens sometimes). Here is my answer:
You will need to 1) educate your neighbors, 2) prepare for them (stock supplies that they can’t or won’t), or 3) be ready to listen to them crying when you won’t give up your stores or fix their broken stuff for them. (I’m not taking evacuation scenarios into account in this case.)
Have you done that? Do you know what level of preparedness your neighbors have? Will they become assets or liabilities if a disaster affects your neighborhood? Do you think you should have answers to these questions? I think you should.
Consider these options:
The “Map Your Neighborhood” program (more on this later – I’ll discuss my experience doing it in my neighborhood) could be an effective solution.
Get to know your neighbors, if you don’t already. This used to be a common practice, but more recently it’s less common, with people moving from home to home more often, especially in more urban areas.
How do you do this? You’re clever. If you’re not friendly, pretend you’re friendly. You can find a way. Bake a pie and take it over. Find a way to do something nice, that fits with who you are, your best guess as to who they are, etc. Unless you’re already off to a bad start somehow, they’ll respond in kind and you’ve just kick-started a hopefully productive relationship!
And if you’re the gregarious type, throw a block party!
You don’t have to be a social butterfly to see the value in knowing your neighbors. They can be beneficial or a huge burden in a bad situation. Make the choice now, and educate them if they need it. And you’ll learn something in the process.
Day 2 – ICS: Incident Command System
I lumped day 2 into this article because I don’t have a lot to say about it. I have to give credit to our instructor for making it somewhat interesting by using a wedding planning analogy, but when it comes down to it, the Incident Command System just isn’t super-exciting to me.
That doesn’t mean it’s not important. We all need to get along. And by “get along”, I mean that I agree that it is useful to have a common command structure to use in the event of an emergency, along with a common language to describe who has which role, a way for different groups to work together, etc.
If you have any reason to interact with people doing CERT, Search & Rescue (SAR), or any other emergency management organizations, you should learn about the Incident Command System (ICS) because odds are very good that they’ll be using that structure.
The good news is that you don’t have to pay for it. FEMA makes training available online, and there are usually two courses you should review: ICS-100 and ICS-700.
It will take a little time, but it will also give you a good idea of what to expect on an emergency scene if you’re working with local, state, and federal government, and more often now, non-governmental organizations who also choose to follow this common (and relatively simple) set of guidelines.
Take a look for yourself. Don’t expect a page-turner, but do expect to learn at least a little bit.
I signed up for a local CERT course and just took my first class. I knew that much of the content wouldn’t be new to me, although I did expect to learn something new – I always do! And so far I have learned some good things, which I’ll be passing along to you as I progress through the course.
CERT stands for Community Emergency Response Training. Many cities offer courses like CERT through their Office of Emergency Management (or whatever they call it). If you go to your hometown’s website (e.g., Anytown.gov), you can probably find a link to an office that deals with emergency preparedness topics for your area. If your town isn’t big enough, try the county or the state.
If a course is offered but not called “CERT”, don’t worry about it. The goals are largely the same, across the different courses, at least the ones I’ve seen in my area (Washington State). Please let me know if you can’t find anything locally. I would be happy to do a little digging to see what I can find, if you aren’t able to.
Why do you care about my CERT course? I’ll walk you through at least some parts of each class, so that you will be able to determine:
Would it be useful for you, friends, or family?
What topics are covered?
What should you expect to learn?
Such preparedness courses have a lot to offer, and as you read further, I think you’ll realize that if you haven’t taken a course, you probably should.
At first glance, yes, but after reading a bit more, their intro is a clever approach to bringing attention to general disaster preparedness. Good job, CDC!
While I personally prefer to do more than only prepare just enough to keep my family safe until we can make it to a shelter (versus sheltering longer-term in our home), most of what they have to say is quite relevant.
For example, some good tips include determining what potential threats you’re concerned about, having three days of food, water, and other supplies on hand for a couple days (although I recommend at least seven days, preferably 14 or more), and knowing your evacuation route.
Good news! I’m actively (as of this posting) working on my second book, and I am confident you’ll find it interesting. Since you came to this website in the first place, the odds are good that you will be interested in a step-by-step, easy-to-follow guide to basic disaster preparedness, and that’s what I aim to deliver.
Here is a little teaser: how do I define “basic” preparedness? At least three days of self-sufficiency, in areas such as food, water, shelter, light, heat, power, medications, communications, and… there will be much more. This book is intended for ordinary people (no camouflage or bomb shelters necessary) who want to make sure they and their families are realistically prepared for a disaster, at least at a basic level. I’ll make sure you have all of the bases covered, and I’ll be including a variety of way to test your preparedness. That’s right – you can be sure your preparations will work. This won’t be a bunch of “doomsday survival” checklists or material from 1950’s survival manuals, but will be a fresh look at preparing in this century, using modern resources.
At first glance, it may seem like a lot of work to put together a robust three-day kit, but it’s easier than you think, and I’m going to explain it to you.
When will the book be ready? As you may know, writing is a lot of work! I’m currently planning on getting the first draft complete by the end of October. It’s an ambitious goal, but I think I can pull it off. After that, I’ll revise, work on cover art, talk to an editor, etc. – all of the fun stuff involved in printing a book.
The Yaesu VX-8R packs a lot of features into a tiny package. How tiny? Take a look! It’s about the size of a deck of cards, if you unscrew the antenna. Take a look at this:
It's the size of a deck of cards!
What can you do with this radio? You can talk on four different amateur radio bands (50/144/222/430 MHz, if you’re interested), while listening to broadcast radio (for example, FM radio) at the same time!
This antenna is long, flexible, and very efficient.
You can use a Bluetooth headset with it, and you can attach a GPS receiver to the radio or to a an attached speaker microphone. When you have GPS installed, you can also use APRS functionality, which means you can transmit your location to other radios, can send and receive simple text messages, and more.
If you wanted to get creative, you could even attach an special antenna and talk to an amateur radio satellite! It can receive weather alerts on special weather radio channels, can easily communicate with repeaters, and more. This is an amazing radio.
The VX-8R has been replaced by the VX-DR and the VX-GR. They’re all small, powerful, and loaded with features. Take a good look at the specifications, since there are some differences.
You can get more information atwww.Yaesu.com, on the VX-8R, the VX-DR, and the VX-GR.
Of course, the antenna adds some size to the radio, but you have many options, from very small (usually inefficient, for short-range communications) to longer (more efficient, if you can conveniently carry it). For example, in the picture directly above you can see the VX-8R with a Diamond whip antenna, which is quite efficient. Soon, I’ll post a picture of my “stealth” antenna. It’s very small, and very inefficient, but very convenient when I need to carry my radio in an inside jacket pocket and only need to communicate short-range.
Is the VX-8R the only small radio? Is it the only one that does APRS? Are some easier to use? No, yes, and yes! Some other common, powerful, feature-filled radios are Icom’s IC-91A and Kenwood’s TH-F6A. And there are many more. Do your research and you’ll find a radio that fits you well. 73!
You may have heard about the book I’ve been writing, “The Road Home,” a story about a boy and his father surviving an earthquake’s aftermath and trying to get back to their family. It’s an exciting story, but it’s also full of cool non-fiction content, like some of the stuff you can see on this site.
The book is done! It’s available for sale! You can see it (and even buy it if you want) here: https://www.createspace.com/3587936. Take a look – I think you’ll like it.
Here’s a picture of the cover:
Cover of my new book, “The Road Home”
More details are on the way soon.
While you can buy it at Amazon.com, in print or in Kindle format, you can also buy it at my eStore (link above). Soon, I’ll post a special coupon code, so you can buy it in the eStore at a discount. Yes, buy it from me and it’ll be cheaper than Amazon. More details soon.
Many people and vehicles use APRS to broadcast their location. Their radios act as beacons, and they can be seen online here: http://aprs.fi. (Give it a minute to load – you may have a lot of data to show in your area.) This map provides up-to-date, accurate location information showing people, vehicles, boats, etc., as they continuously transmit packets GPS of data to other APRS-compatible radios. Take a look and see for yourself.
You can see a recent snapshot of APRS activity across the U.S. here, from late 2010: http://www.aprs.org/maps/USA-Turkey-10.png. As you can see, most of the APRS traffic takes place in urban areas or near highways, but plenty of people in rural areas use APRS too.
APRS gives your radio some fascinating flexibility! But what is it? ‘APRS’ stands for Automatic Packet Reporting System, a system developed by Bob Bruniga, whose call sign is WB4APR. (In case you’re wondering why the call sign matters, ham guys like you to know what their call sign is, in case you come across it on the airwaves sometime.)
It’s an interesting, flexible, and useful system, which allows users to transmit text messages, alerts, bulletins, etc., in addition to their GPS coordinates. It’s a form of digital communication that you can use with handheld, mobile, and base station amateur radios.
You might be able to imagine how handy this system would be for people on search and rescue missions or during other emergencies, aside from during everyday communications. A rescuer can transmit his or her location while searching for a victim. A support vehicle on scene or a vehicle on the way to help could be located in an instant on a map, at any time. A standard status report could be given with a few button clicks. That’s cool!
Everyone should know basic first aid and CPR. However, you probably shouldn’t attempt first aid techniques if you’ve never actually been trained on how to do them properly. If you make a mistake, you could accidentally make a person’s injuries even worse! There are a variety of options for taking a certified, safe first aid course.
The Red Cross commonly offers several different courses, and there is probably at least first aid and a CPR course available in your area. You could also check with your local hospital or fire department. Why take first aid and CPR? Because someone you know, sometime in your life, will probably hurt themselves, maybe even seriously, and you should be able to help! You may even save someone’s life.
Neat Trick: One ‘tool of the trade’ you may learn about in a basic first aid course is a technique to determine whether a splint is too tight: you give a toenail or fingernail of the splinted limb a little squeeze. If the pink/red color (which is blood flowing back to the area) comes back quickly, that means you are probably getting enough blood flow in that area. If the color stays white or light pink and doesn’t darken again, then blood isn’t flowing as quickly as it should, and you may need to loosen the ties on the splint, in order to prevent even more damage to the wounded area. But remember, this book is not a first aid course and I’m not a doctor – go take a real course with your local Red Cross!
The Quick Version: You transmit a message with your radio, the repeater receives the message, and the repeater simultaneously re-broadcasts that message, usually with much more power and range.
Now for the some interesting details…
Many repeaters listen for a special tone, which is included in the signal that carries your voice when you transmit your spoken words. Usually this is programmed into your radio when you set up the frequency to use with the repeater. Without that special tone, the repeater won’t repeat what you transmitted.
The offset tells your radio what distance to move up or down the frequency spectrum, in order to order to match what the repeater will receive and transmit.
For example, a repeater will receive a signal on 146.050 MegaHerz (MHz), and then re-transmit that same signal on 146.650 MHz (with a lot more power and range, so that many more people can hear it).
This means that when you use your radio, you will press the transmit button, your radio will transmit your voice on 146.050 MHz, the repeater will receive your transmission, and then it will re-transmit it on 146.650 MHz. That way your radio can both broadcast and hear any replies, but now instead of having limited power and range (since in this case, you may be using a low-power handheld radio), now your message can be broadcast from the top of a nearby mountain (where repeaters are often located) with many times the power. Cool, right?
The acronym MRE stands for “Meal, Ready to Eat.” An MRE is usually packaged as a full meal, including a main dish, crackers or bread, and some kind of spread like peanut butter, cheese or jam. They usually also contain a snack, dessert, spoon, gum, salt, pepper, instant coffee, cream, sugar, and even toilet paper. Newer MRE’s also usually have a special heater that is activated by pouring a small amount of water into a plastic bag, which can be used to heat the food when the weather is cold. (Some MRE main dishes taste much better warm than cold!) MRE’s can be stored for up to three years at 80 degrees Fahrenheit, although they can last for years longer than that, stored at lower temperatures. Although they are heavier than most freeze-dried backpacking meals, they are sometimes quite handy because they don’t require any cooking or boiling water.
In recent years, it has become very difficult if not impossible to obtain surplus military MRE’s, although they are available legally from various distributors. For short-term, easy-to-prepare, high-calorie meals that require no additional water or preparation, MRE’s are hard to beat!
A ham radio operator is issued a call sign by the FCC, after he or she passes a licensing exam. The call sign is used to identify the person operating the radio, whenever transmitting on ham frequencies. Since 1934, west of the Mississippi, call signs that start with “K” are issued, and east of the Mississippi, call signs that start with “W” are issued. If you listen to music on the radio in the car or at home, you will occasionally hear the station announce “This is KMPS” or “You’re listening to WKRP” (or some other combination of letters) – this is their call sign, also issued by the FCC. Since the station is a business, their call-sign is a slightly different format, but the idea is the same. People who talk on certain frequencies have to identify themselves with a call sign. When you get your license, you’ll get your own call-sign!
If you’re willing to pay a few dollars extra, you can get a call-sign with letters and numbers that you choose, called a “vanity call sign.” And depending on the level of license that you choose to get, they will be anywhere from four to six characters long. If you are able to get the “Extra” license, you can get a call sign with four, five, or six characters. Having a “General” license will allow you to use five or six characters, and the “Technician” license will allow you to use six. If you prefer, you can keep the original six-character that you are issued by the FCC, regardless of what additional licenses you may get later. Here are some fun possibilities, combining different characters: N0HOW, K1SS, K0RN, W0MAN, WA5HME, and KN1TTR. When it’s your turn, you choose!
What is ham radio? It’s the term people use to refer to amateur radio, a fun hobby for many. But why “ham”? Some people speculate that it’s because certain people involved in amateur radio back in the old days really loved to talk, to and would “ham it up”, telling long stories to their buddies when they’d get together on the airwaves to chat.
How does ham radio work? The Federal Communications Commission (FCC) has set aside certain frequencies for people to use for non-business-related communication. People use these frequencies to talk to each other using different kinds of radio equipment. Not only can you talk back and forth on these radios, you can also send text messages, transmit GPS coordinates, talk to repeaters, send and receive TV signals, bounce signals off of satellites or even the moon. Some people have even used hand-held radios to talk with the International Space Station! That’s right – a person on the ground aims an antenna upward, tunes a radio to the right frequency, and has a conversation with an astronaut who is also a ham radio operator. Pretty crazy, right?
To use a radio that works on amateur radio frequencies, you need to take a simple test and get a license. The first license, called “Technician”, is not difficult to get, and there are a variety of books, CD’s, and websites available to walk you through the questions and answers which are all published already. Once you’ve reviewed the material and feel comfortable, you can take a test and get your own license! Many ham radio clubs administer the tests, and will be happy to help you with the simple paperwork at the same time. Soon after, you’ll get your call-sign from the FCC, and you can get on the air!
What should be in your backpack when you go on a hike?
The “Top Ten List” contains all of the essentials for wilderness survival, which everyone should always have with them when they go hiking in the wilderness, even just for a day trip. For overnight expeditions, you should have a variety of additional supplies (for example, a sleeping bag), but this is a list of the minimum supplies needed.
Here is the list, with some examples you can research further. Of course, if you’re hiking in the desert or the rain forest, you’ll have different needs, but this is a good starting point for most hikers:
Emergency Shelter: A ‘bivvy-bag’, plastic tube tent, ‘sil-tarp’, poncho, large garbage bag, or mylar blanket (‘space blanket’)
Jacket: It should have a hood, and be warm and waterproof (consider Gore-tex)
Fire starter: Waterproof matches, stormproof lighter, ferrocerium rod, magnesium block
Water: At least one liter per person, with a way to filter and/or purify more. Depending on your location, you may need to carry two liters or more, even for a day trip.
Food: Snacks, Clif bars, MRE snacks
Map and compass: A high-quality compass and topographical map
Knife: A sturdy, fixed-blade knife, if that’s legal where you live. Otherwise, a lock-blade, folding knife will work.
Multi-tool: Made by a reputable manufacturer, like Leatherman, Gerber, or SOG
Whistle: Many survival whistles can be heard from a great distance, and they weigh as little as a fraction of an ounce – there is no reason to not have one of these at all times.
Flashlight: Use an LED flashlight – modern ones are very bright, and the ‘bulbs’ never burn out. Don’t forget spare batteries.
What should you do with all of these items? Obviously, you will need to know how to use them. While I’ll cover many of these topics in upcoming articles, in the meantime, you need to do your own research.
But wait! There’s more! One last thing – the most important thing you must have with you – and thank goodness you already have it screwed onto your shoulders – your head! If you don’t know what to do with any of the items listed above, you need to learn. Your brain is the most important tool you have, and if you have the ability to think clearly and apply relevant experience to a dangerous and even life-threatening survival situation, you will be much better off.
Are you familiar with the term Everyday Carry? It’s also known as “EDC.” Long story short, EDC gear is what you have on your person all the time.
Aside from the common items such as a watch, wallet, cell phone, a list of things commonly carried by people who like to be prepared often contains many or all of the following:
A pocketknife: This is one of the most common things carried on a daily basis. As long as man could shape metal, he’s carried a knife as a tool or weapon. A pocketknife has more uses than I can list here. One example of a relatively inexpensive and high-quality knife, which can be opened easily with one hand and clipped into a pocket or waistband is the Spyderco Delica.
A multi-tool: One of the most popular is the Leatherman brand of multi-tool. Personally, I prefer the Leatherman Charge, and Leatherman makes several other very useful variations. Other popular brands are Gerber, SOG, or Victorinox. These tools are amazingly handy, and often contain pliers, wire cutters, a knife blade, saw and/or metal file, various screwdrivers and more! With a multi-tool on your belt, you can accomplish hundreds of useful tasks.
A flashlight: With a flashlight in your pocket (or on your belt), you can….. well, see in the dark! I guess it goes without saying how that can be handy in a crawlspace or attic, when you’re looking under the sofa, or just when it’s dark out. You can find a variety of small (or even tiny) flashlights that run off of a watch battery, or AAA, AA, or CR123 batteries. The brightness ranges from just barely visible to hundreds of lumens for a pocket flashlight.
With just these three items, you can solve a variety of problems, day or night. There are many additional options you could include, for example a lighter (fire is both cool and handy, depending on your situation), a thumb drive (essential if you work with computers), pepper spray (OC spray, a simple and effective self-defense tool), duct tape, or extra medication.
One of the best resources for learning more about Everyday Carry is the forum dedicated entirely to this topic: www.edcforums.com. The folks there would be happy to help you with any questions, and have a ton of great ideas.


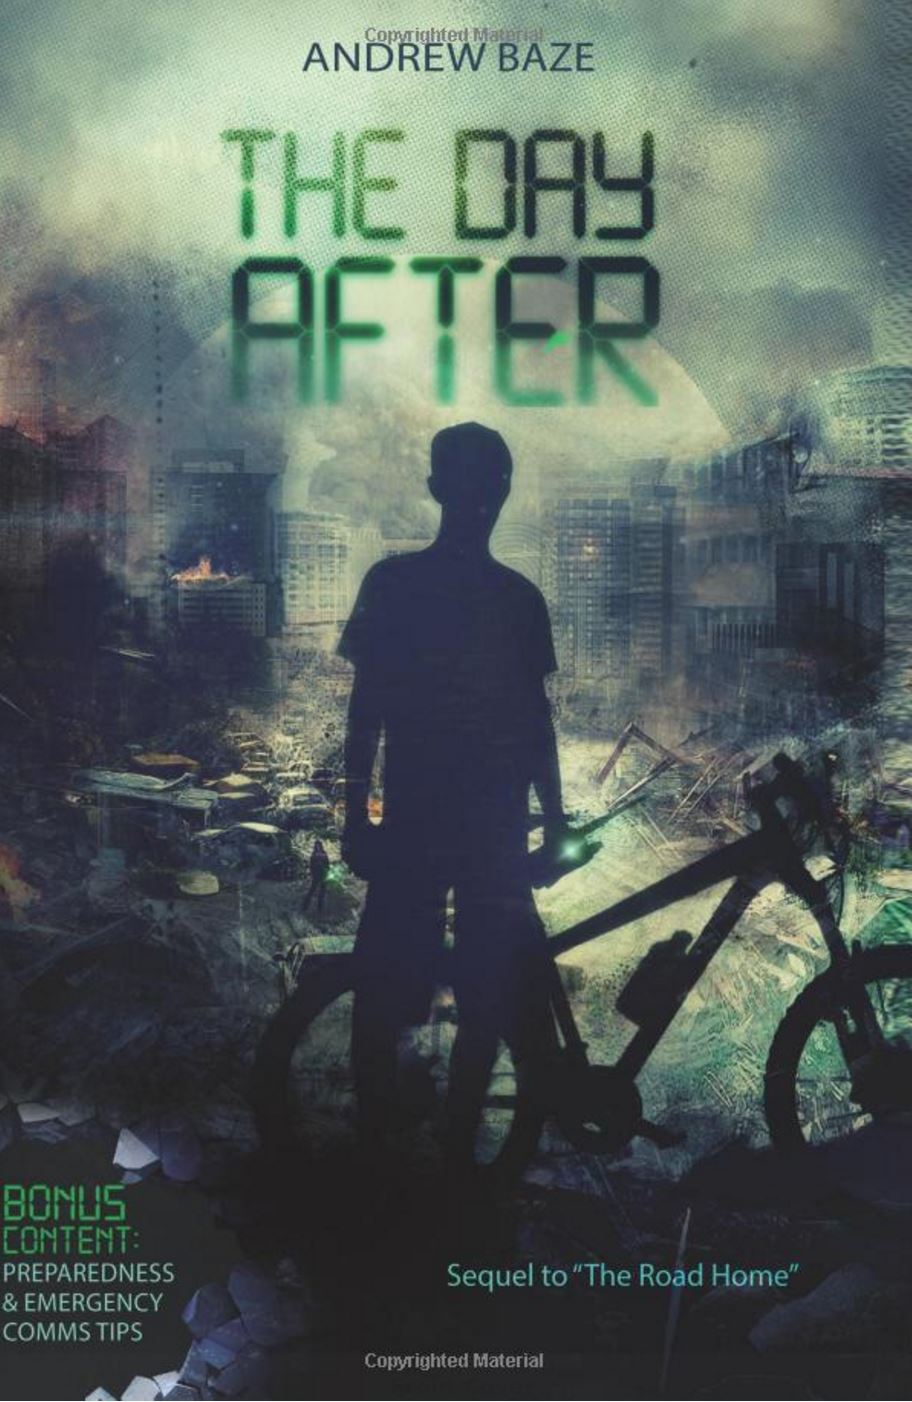


